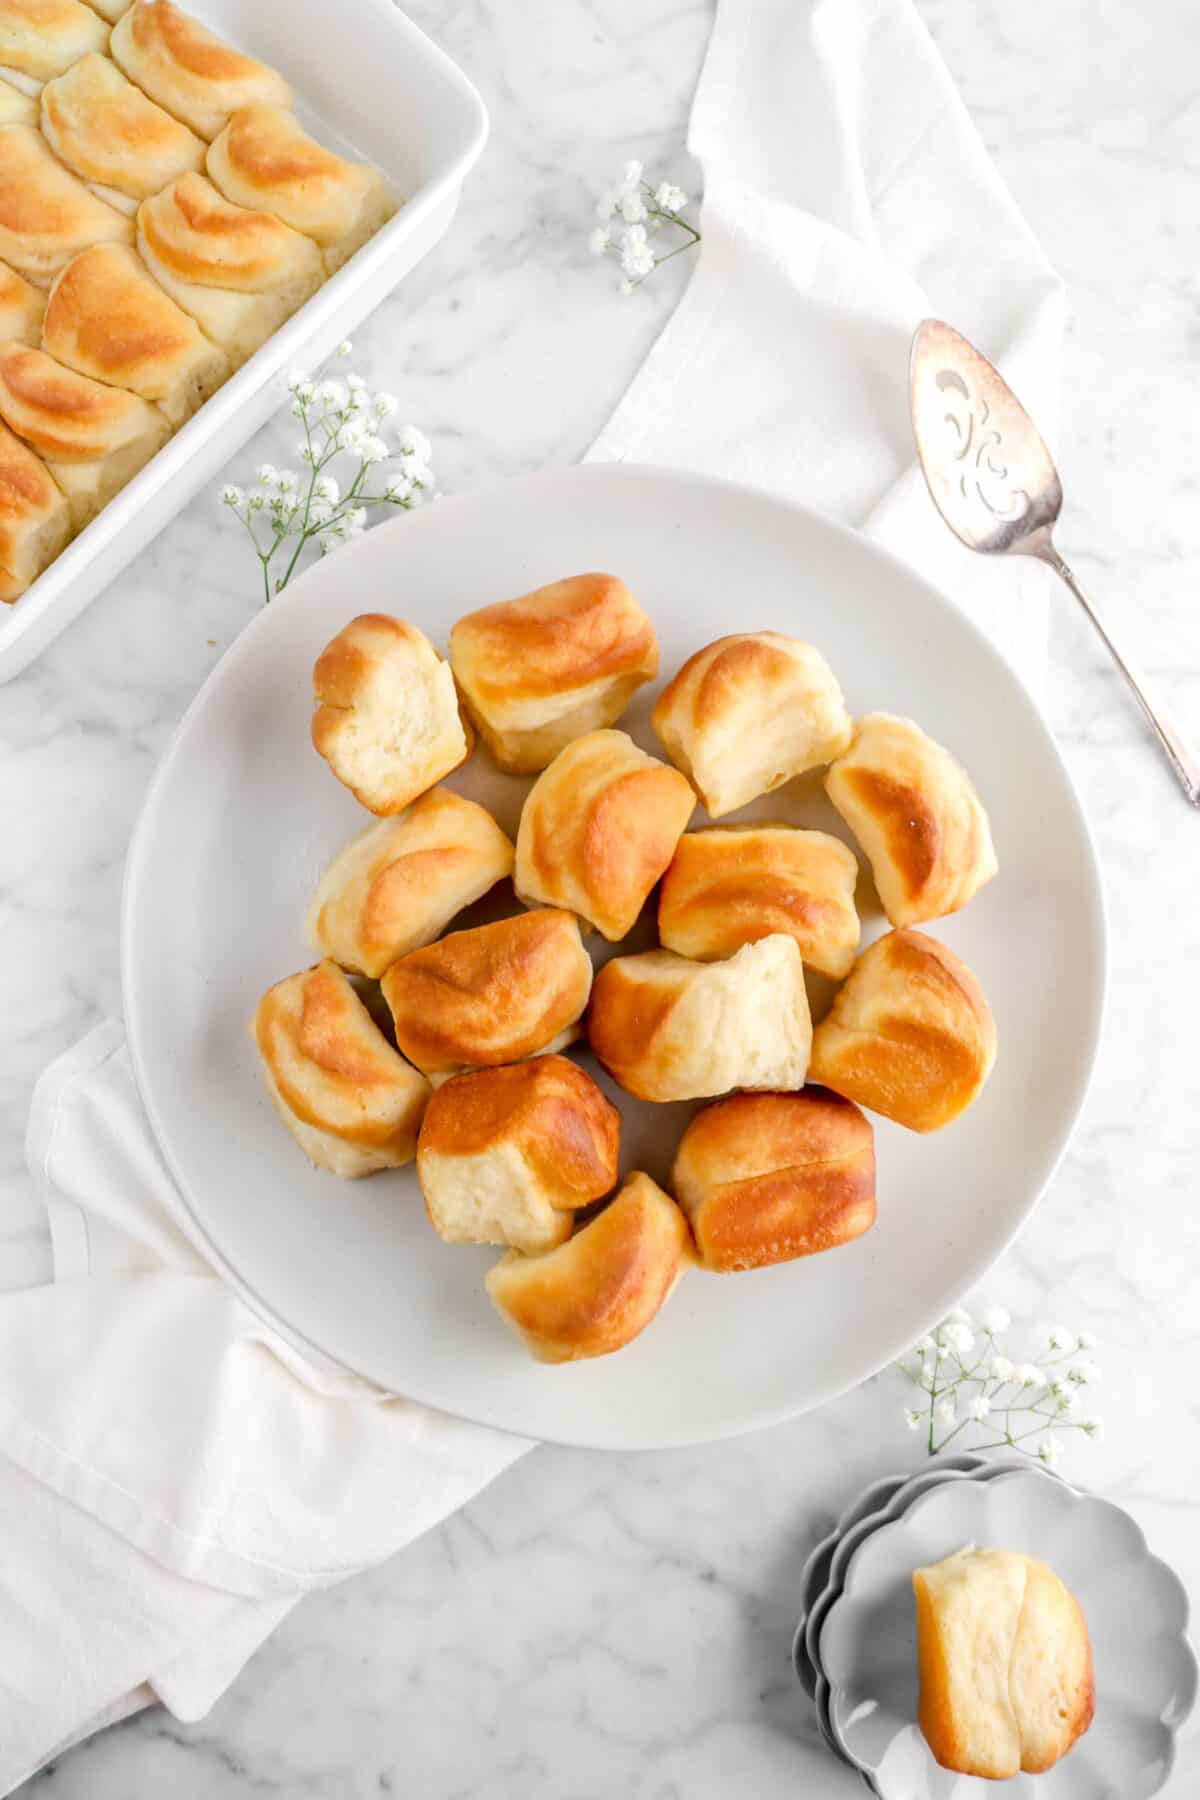
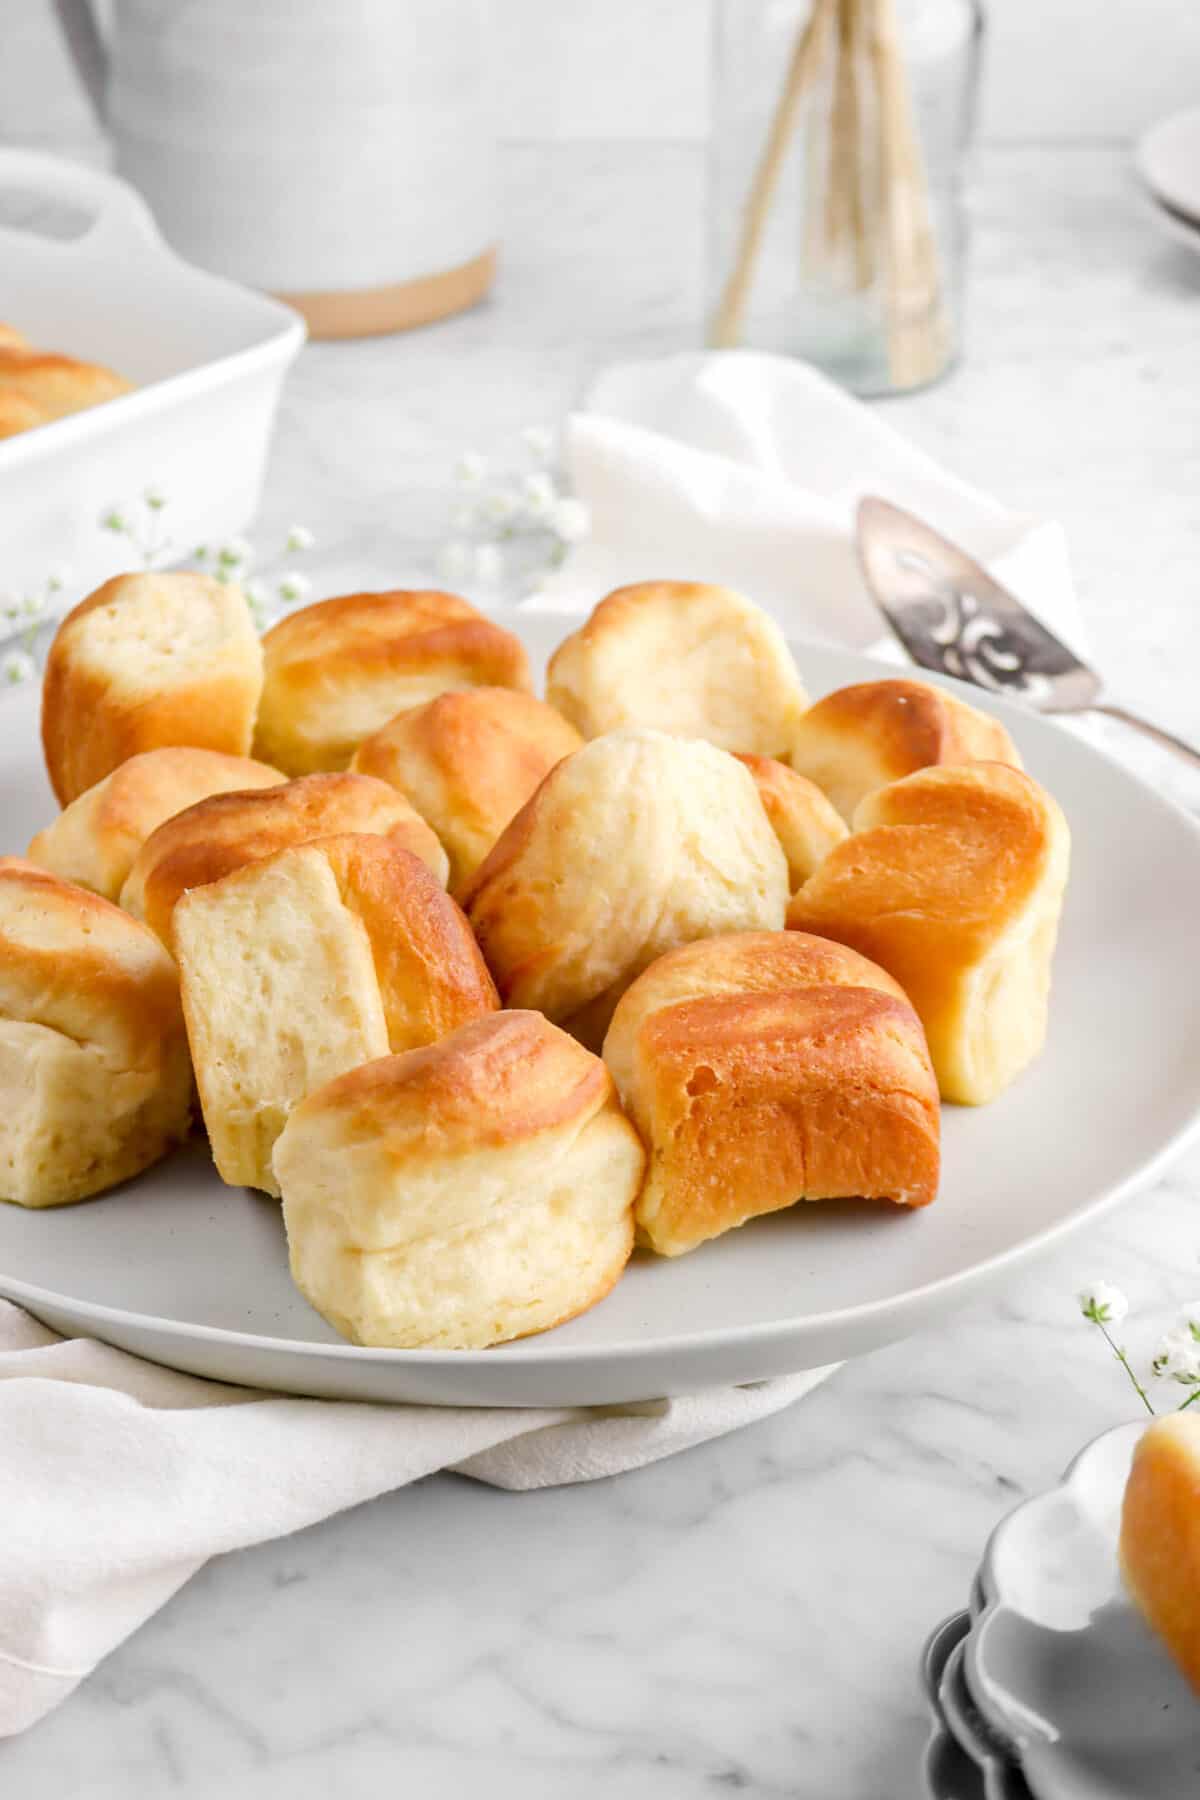
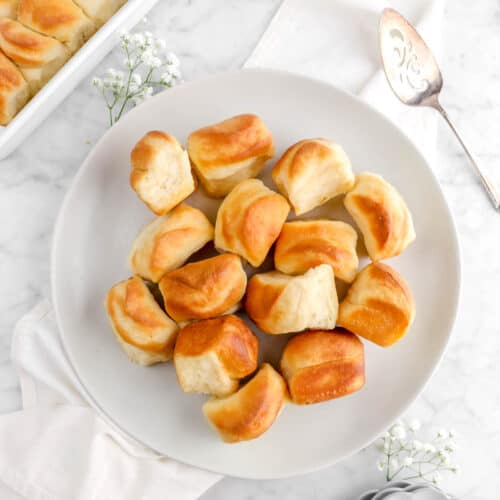
Buttery Pull-Apart Dinner Rolls
No holiday dinner is complete without these Buttery Pull-Apart Dinner Rolls! Light, airy, buttery, and SO delicious. Be sure to serve them warm, right out of the oven, with an extra smear of butter for a roll that is truly delectable! These rolls are actually so much easier to make than you might think, uses just nine ingredients you probably already own, and they have an over-night proof! Which means, after mixing these up, you’ll have more time to get things done during the holiday’s…Oh, and freshly baked rolls the very next day that are sure to impress. It doesn’t get better or more delicious! These are truly the perfect addition for all of your upcoming holiday dinner needs…or just your regular weeknight meal. SO. GOOD.
→ This post is also available as a Web Story: Buttery Dinner Rolls
About The Recipe
The holiday’s are finally here again and that means it’s finally time to bake up a batch of these buttery dinner rolls! I could not be more excited! The smell of these baking in the kitchen is ultimate comfort for me and my family. The holiday’s don’t start until a large batch of these are in the oven (and a few Christmas carols playing, if I’m being honest!).
And even though these rolls are great year-round, we only make them once a year! It’s just something special for the holiday’s in our family. We actually make such a big batch of them that it from before Thanksgiving through Christmas!
We generally even have some leftover in the freezer when the New Year gets here. It’s insane how many of these we make! But, it’s always so much fun because, even though the waiting time is long, the actual hands on time is not anything too crazy. It’s actually kind of relaxing and it’s so easy you can get the whole family involved!
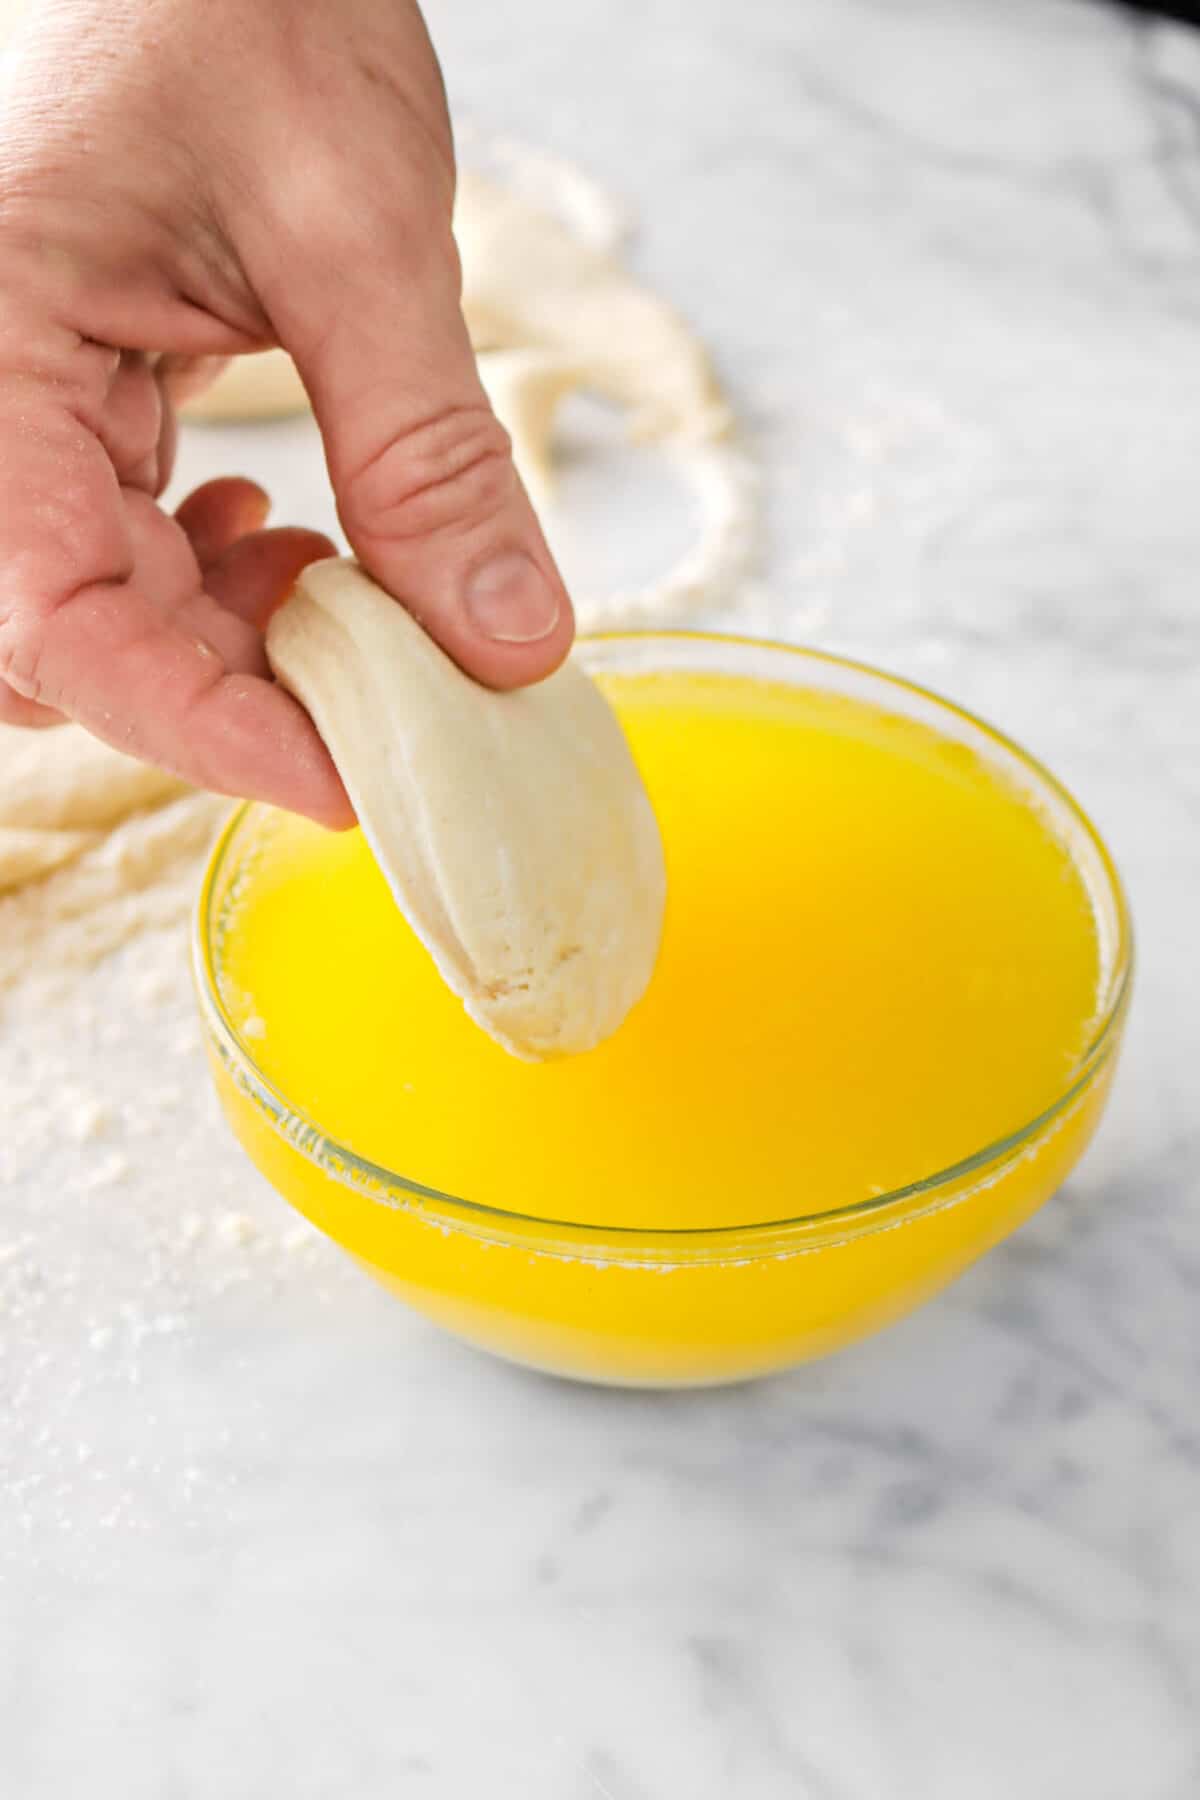
My mom always let me help make these when I was younger. We were fortunate enough to have a bi-level island when I was growing up, so everyone had their own work station. I, of course, always had the lower island (and a step-stool!) and my mom would let me dip the rolls in the butter before handing them to her to fold.
It actually was easy enough that I learned pretty quickly how to fold them because all you need to do is fold them in half!
So, if you have little ones or just family hanging around this holiday season, you can definitely get them involved with making these rolls.
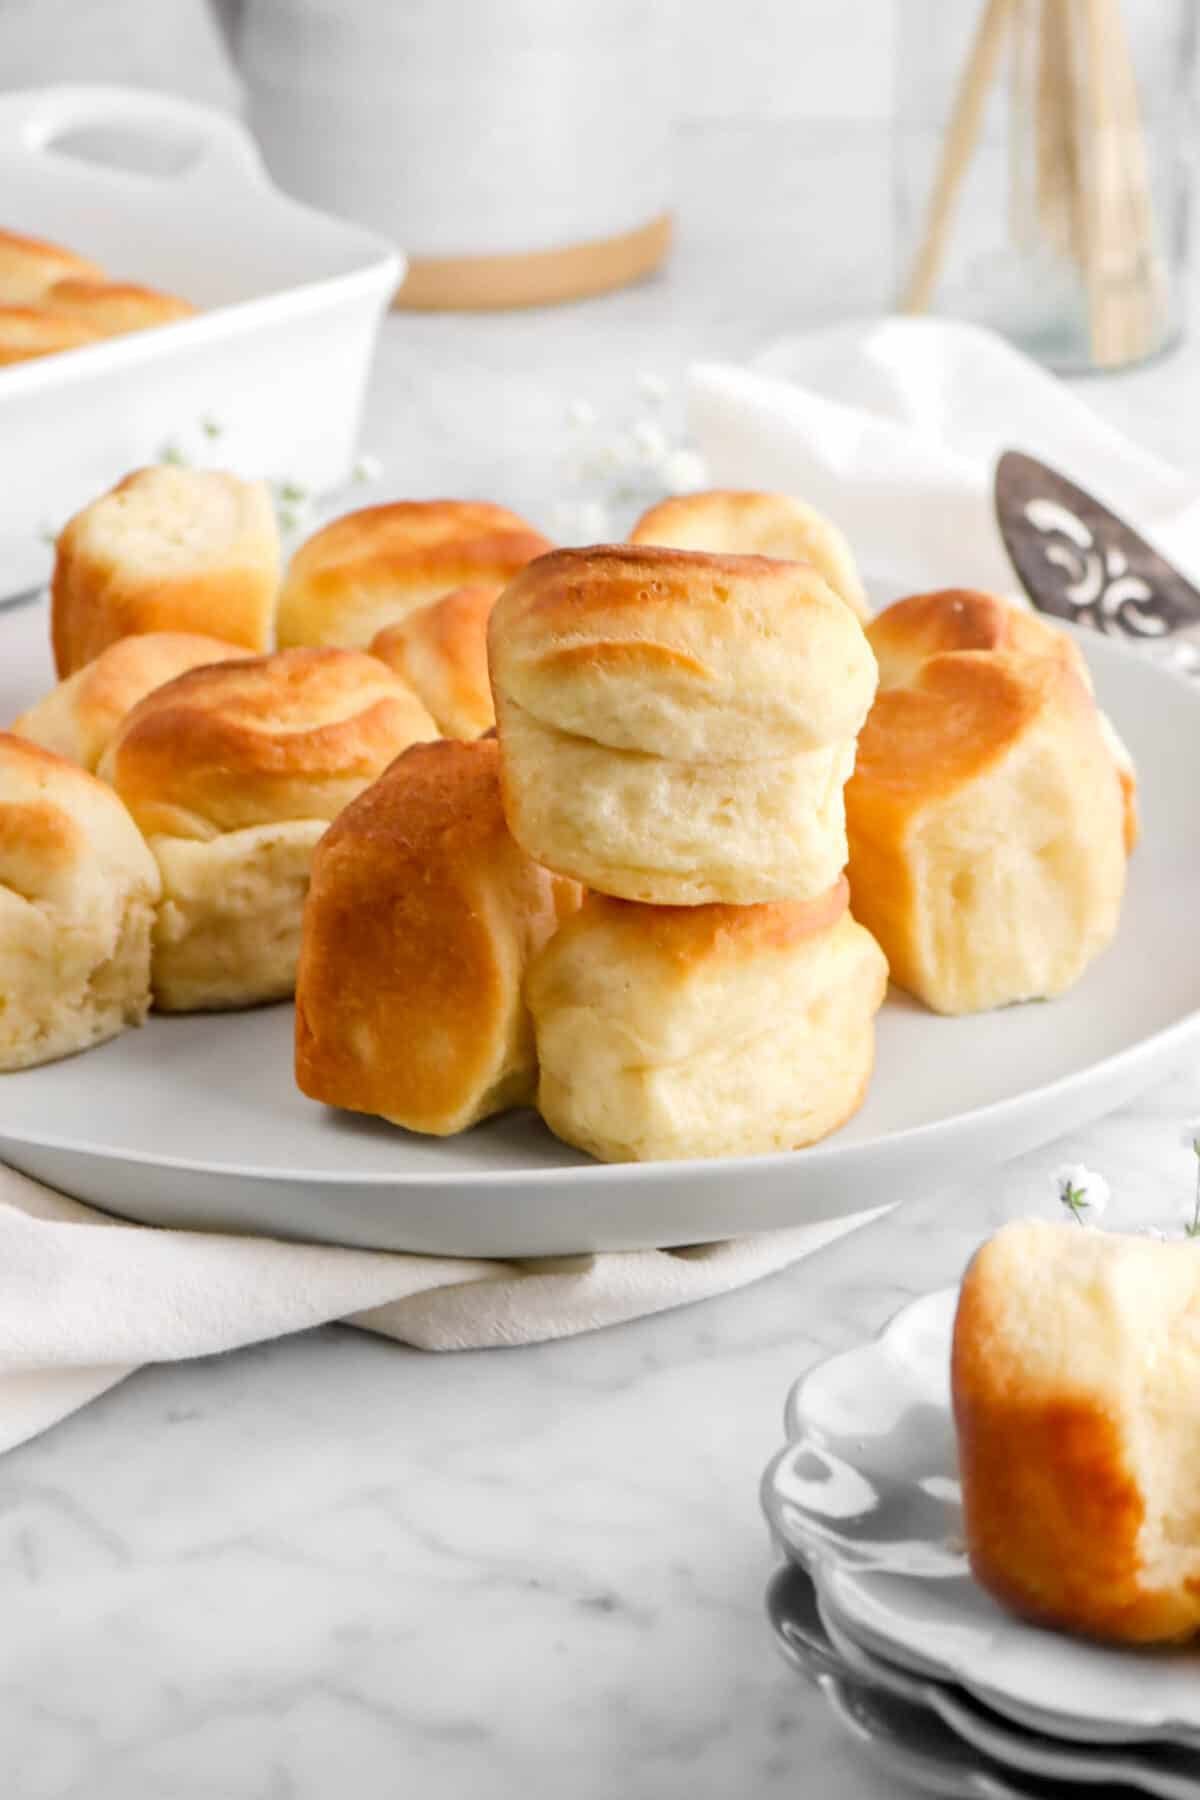
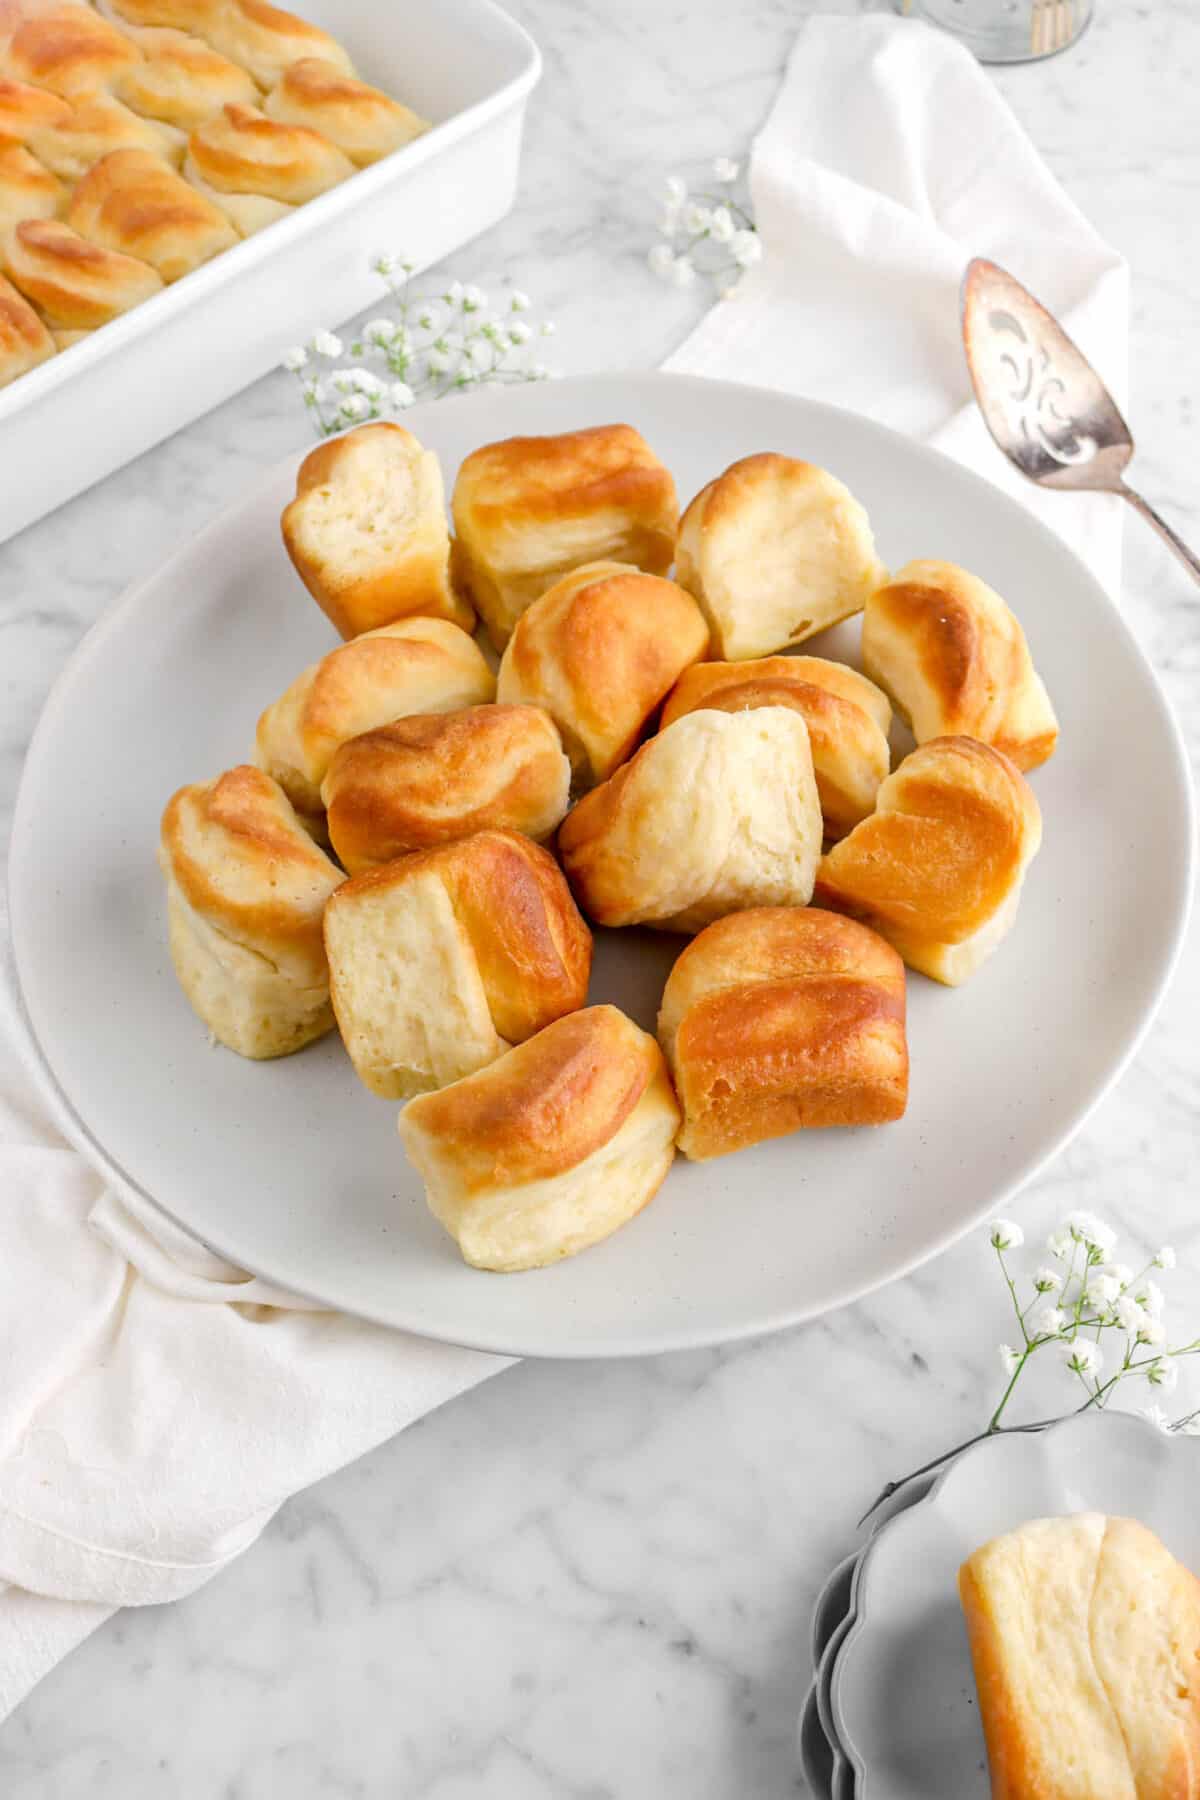
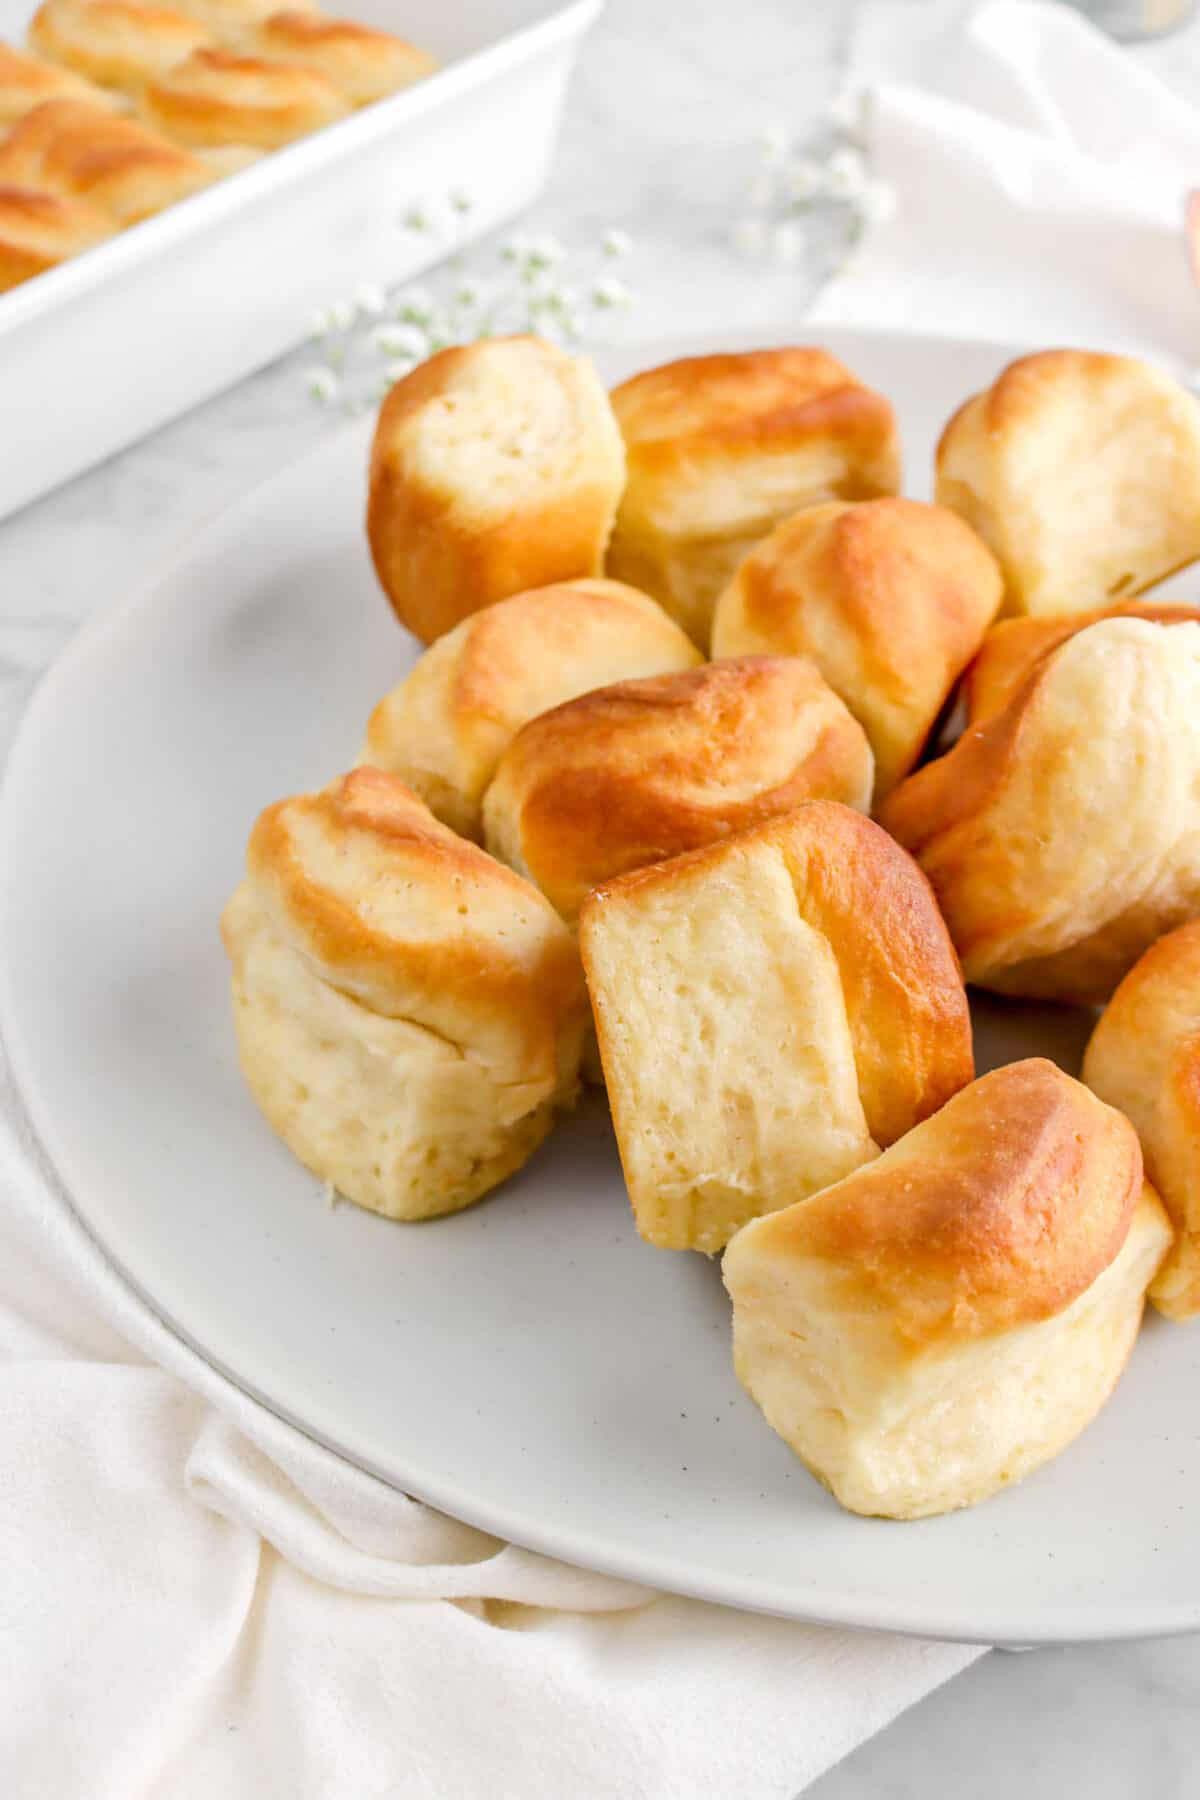
So, while these rolls are great fun to make, they also just taste SO darn good. Every bite just melts in your mouth. Buttery, a touch salty, perfectly sweetened, and just the most delicious dinner roll ever!
Equipment Needed
- Large Mixing Bowls
- Medium Sized Pot
- Dough Rising Bucket
- Large Sieve
- Rolling Pin
- Sheet Pans or Casserole Dishes
Ingredients
- Whole Milk
- Unsalted Butter
- Sugar
- Instant Yeast
- All-Purpose Flour
- Baking Soda
- Baking Powder
- Kosher Salt
- Salted Butter

Instructions
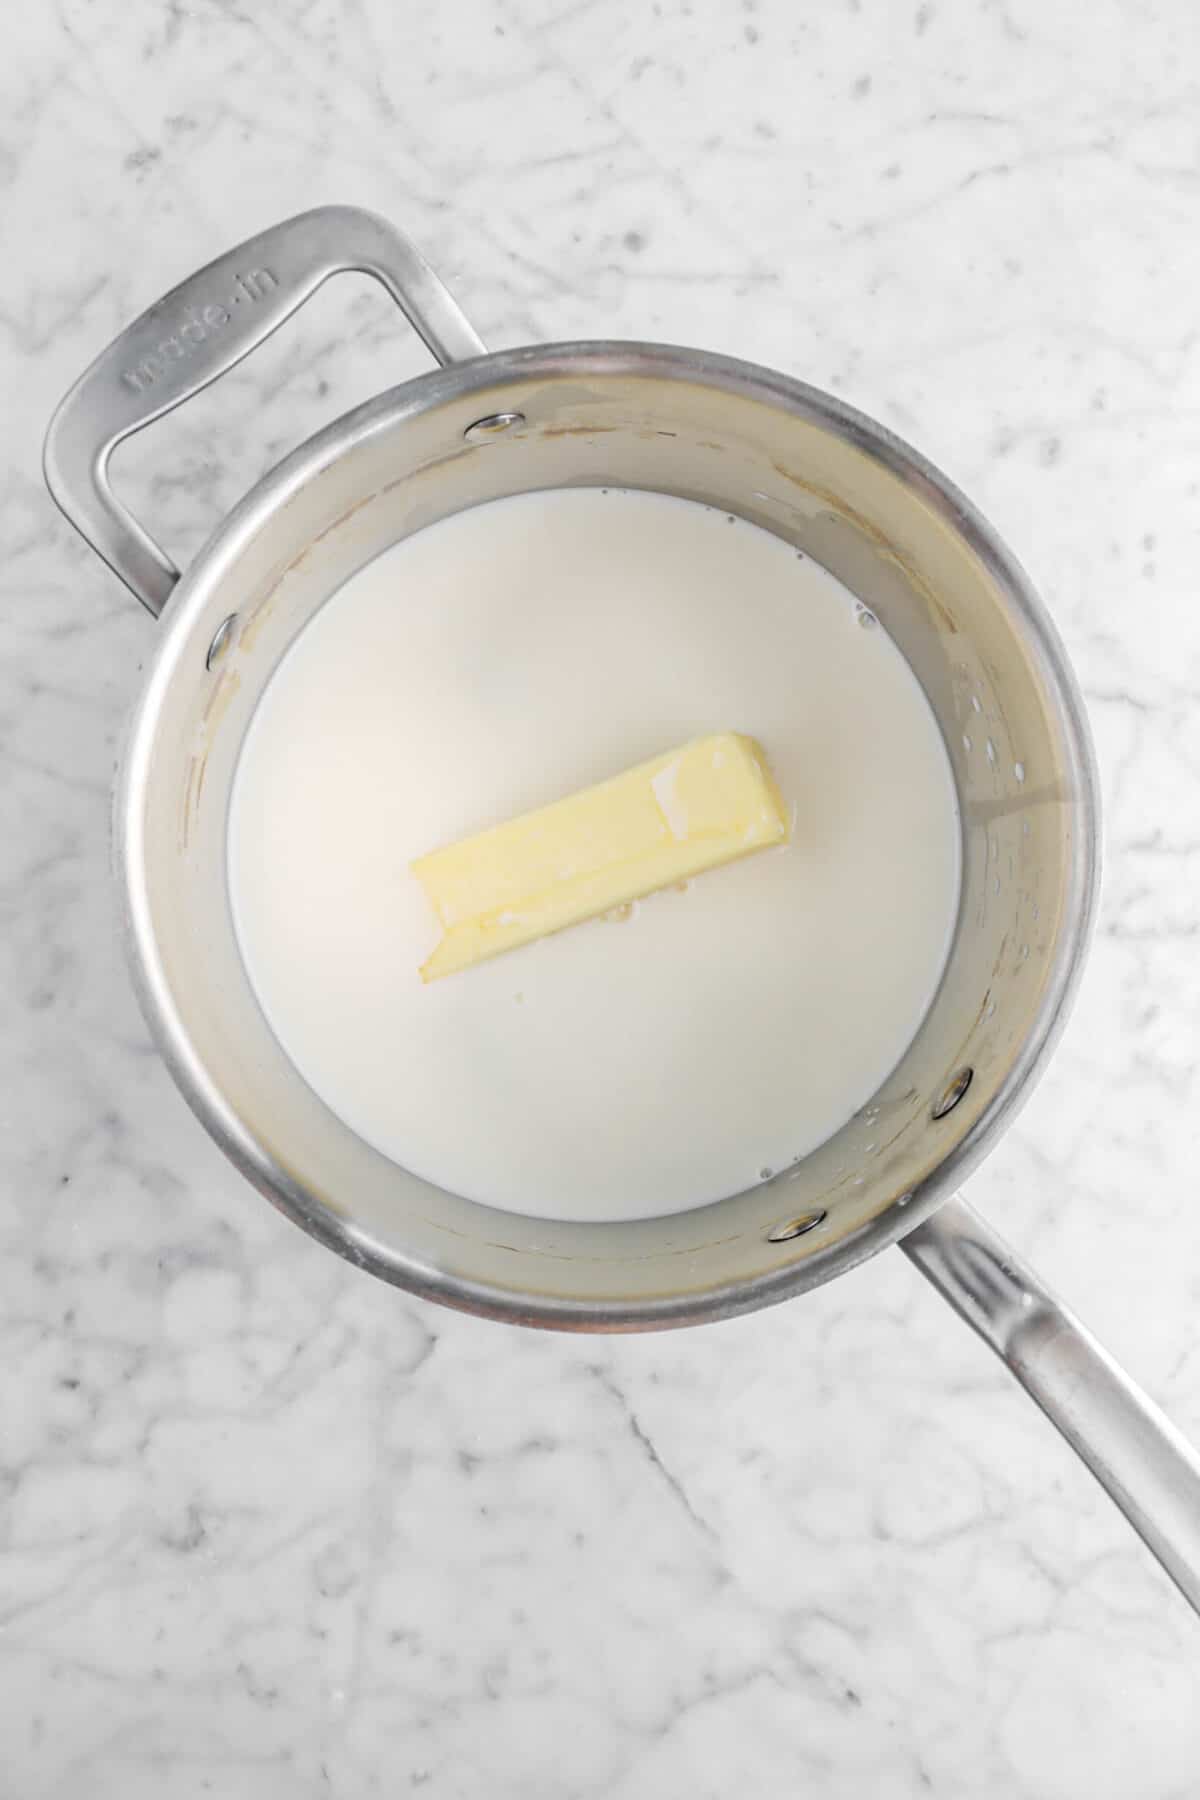
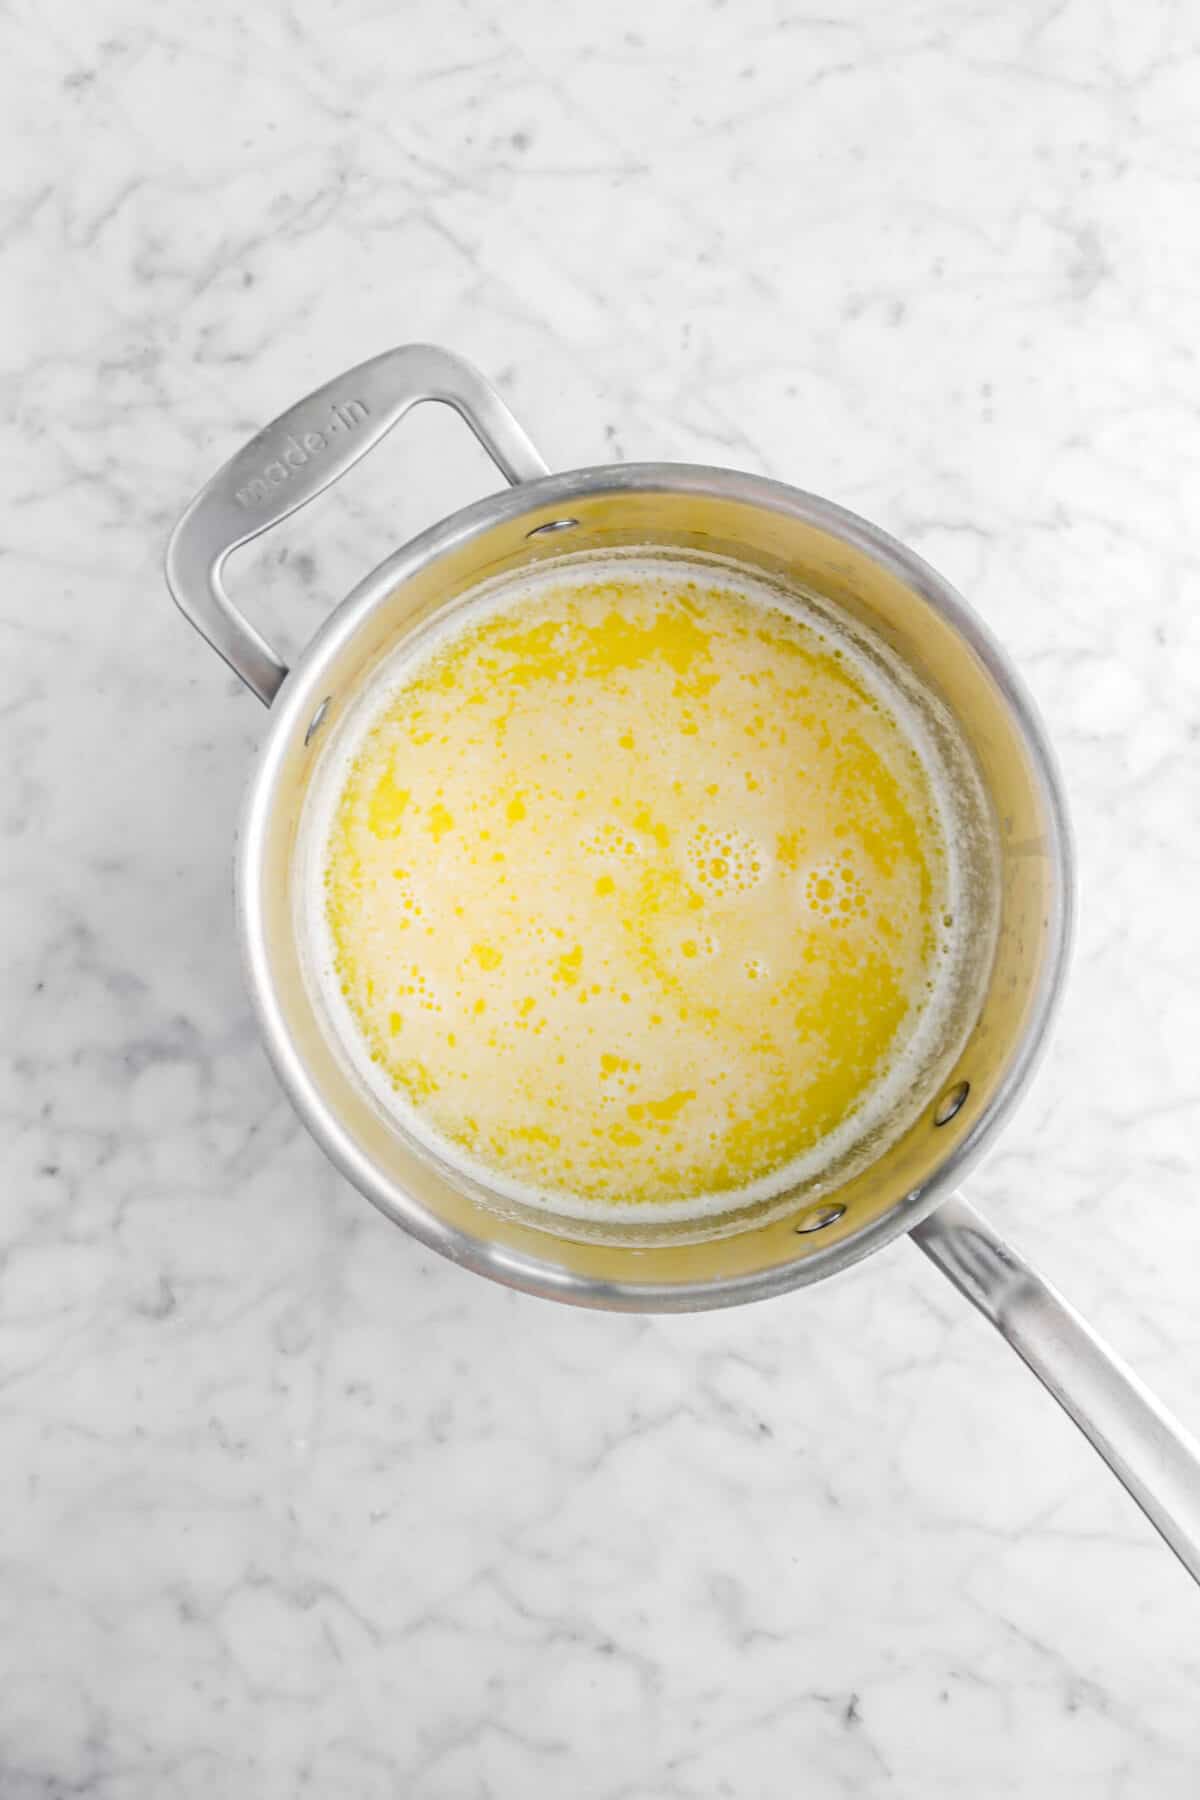
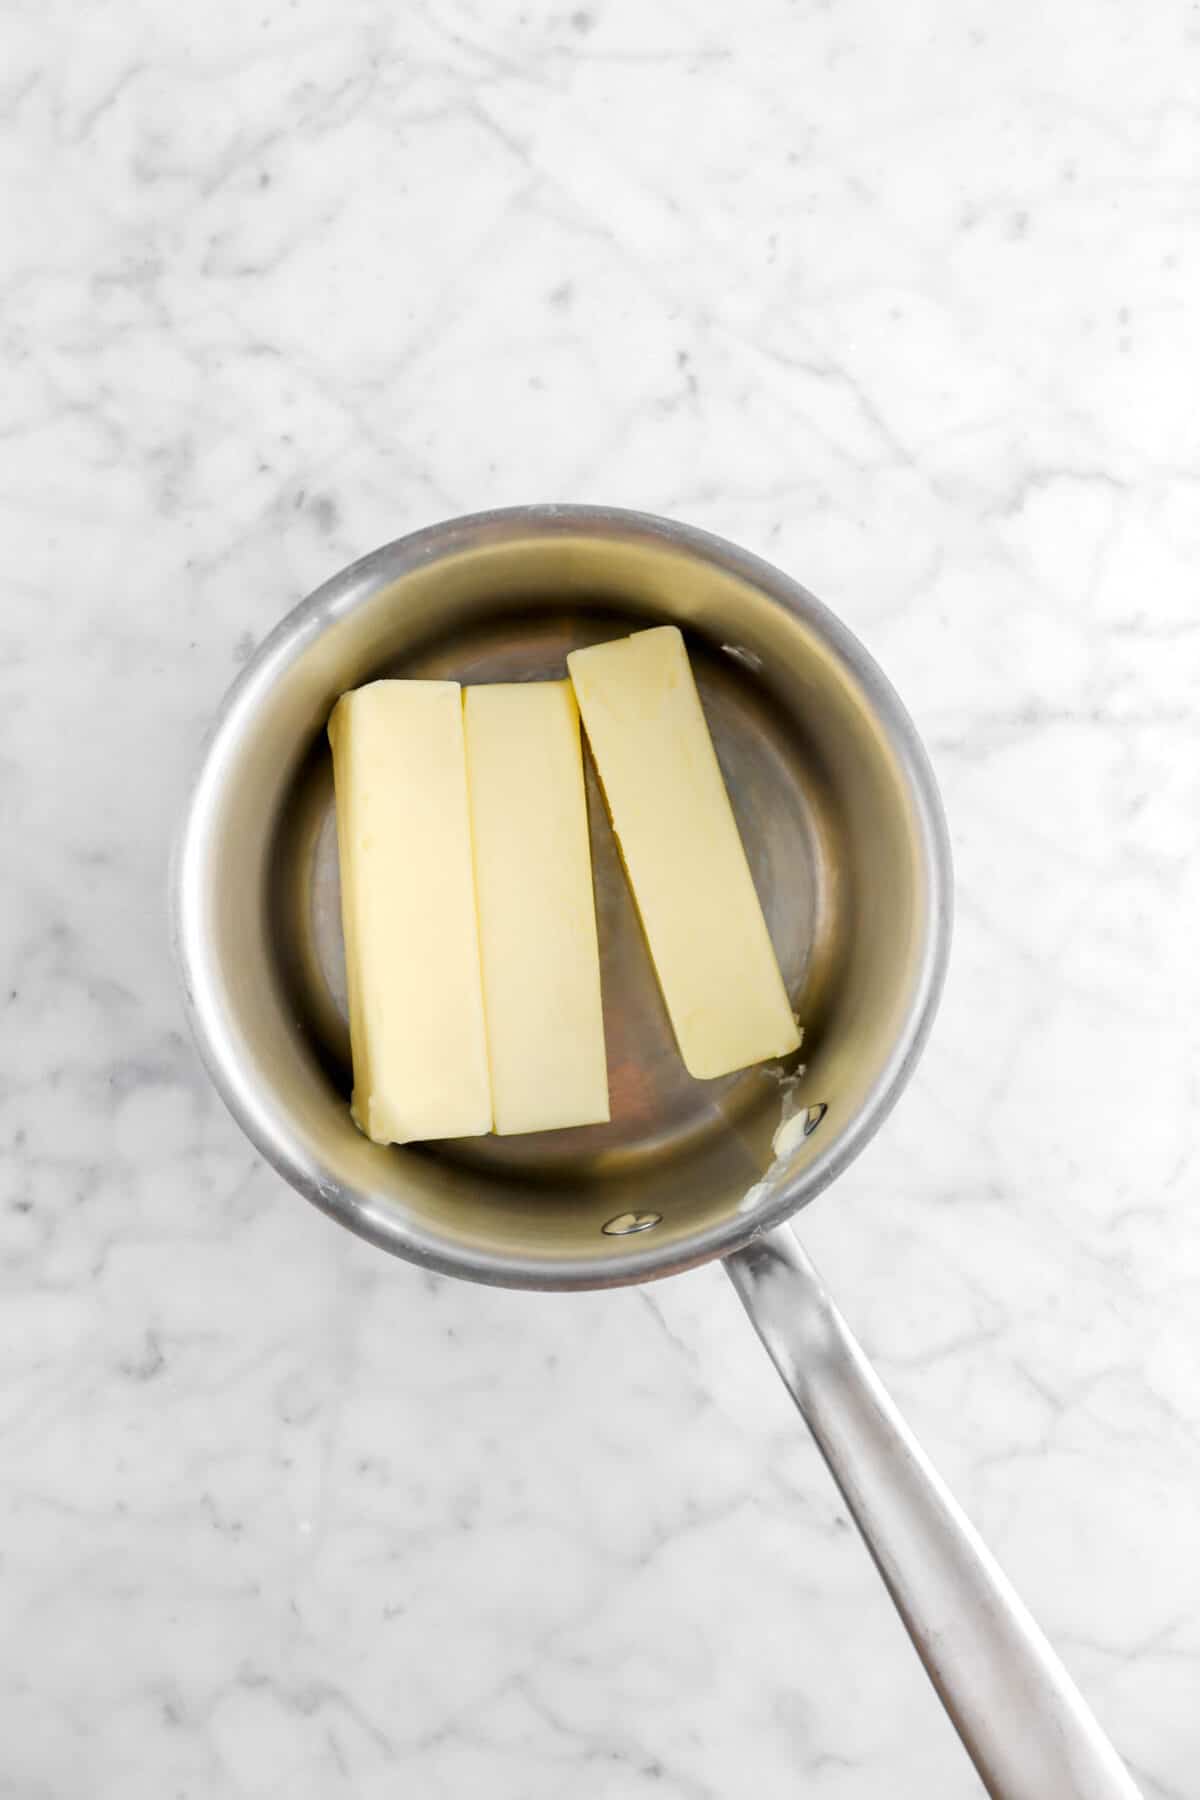
Combine the milk, unsalted butter, and sugar in a medium saucepan. Place over low heat and stir until sugar dissolves and butter melts. Do NOT boil. Remove from the heat and allow to cool.
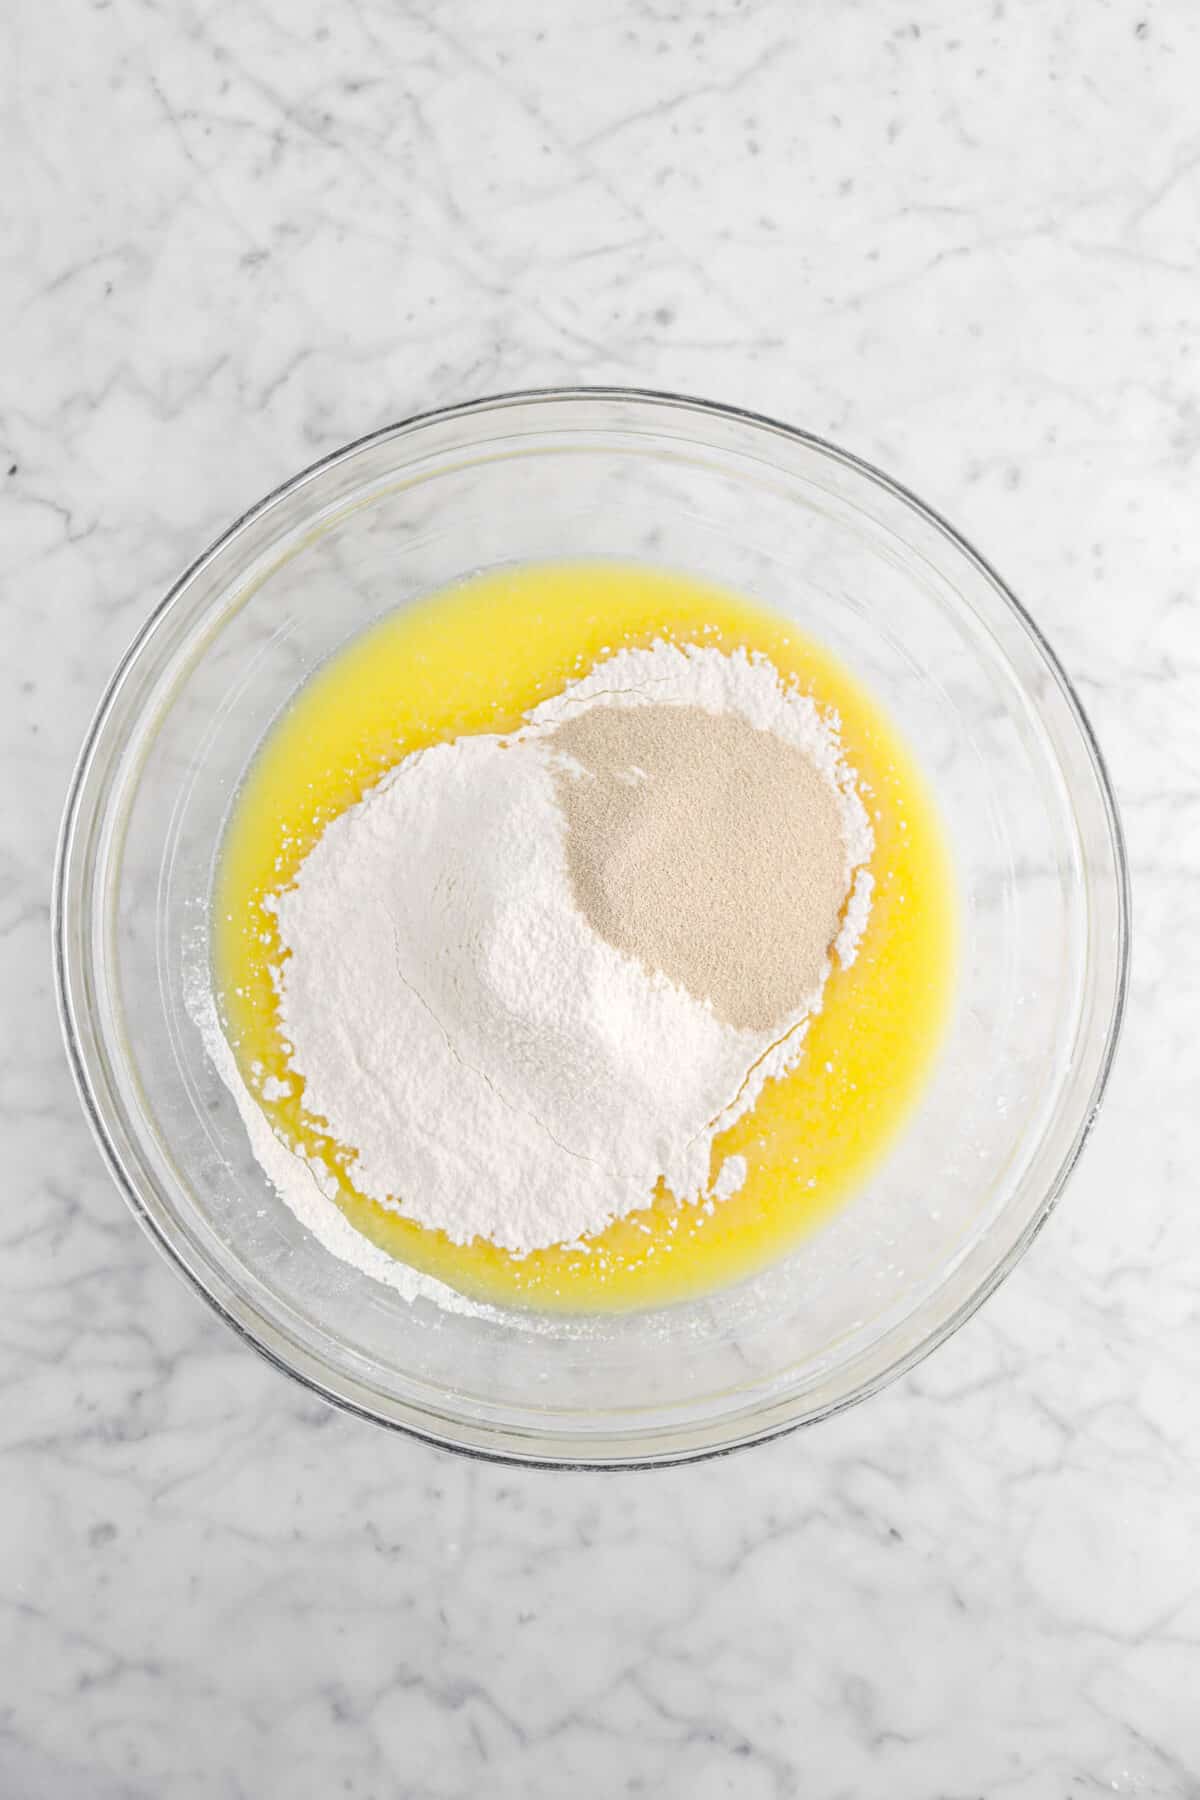
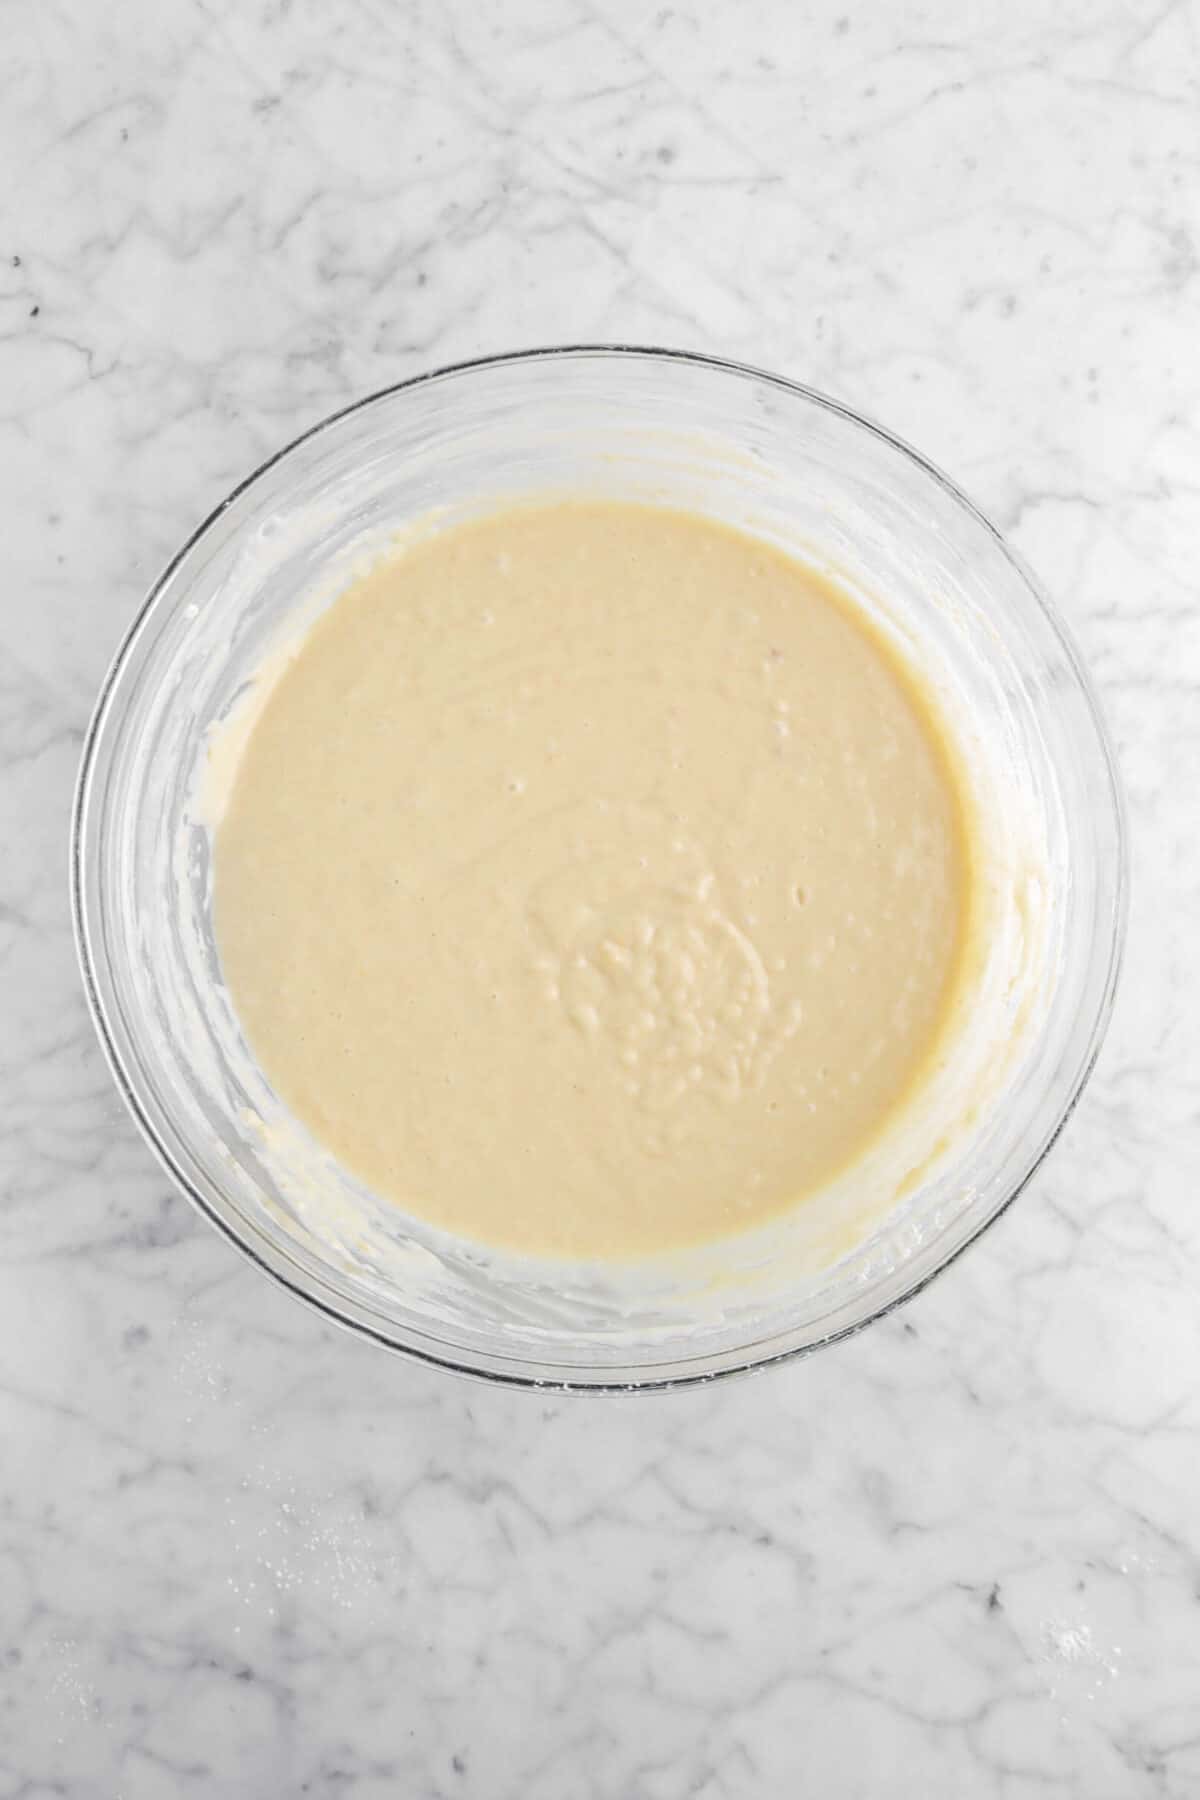
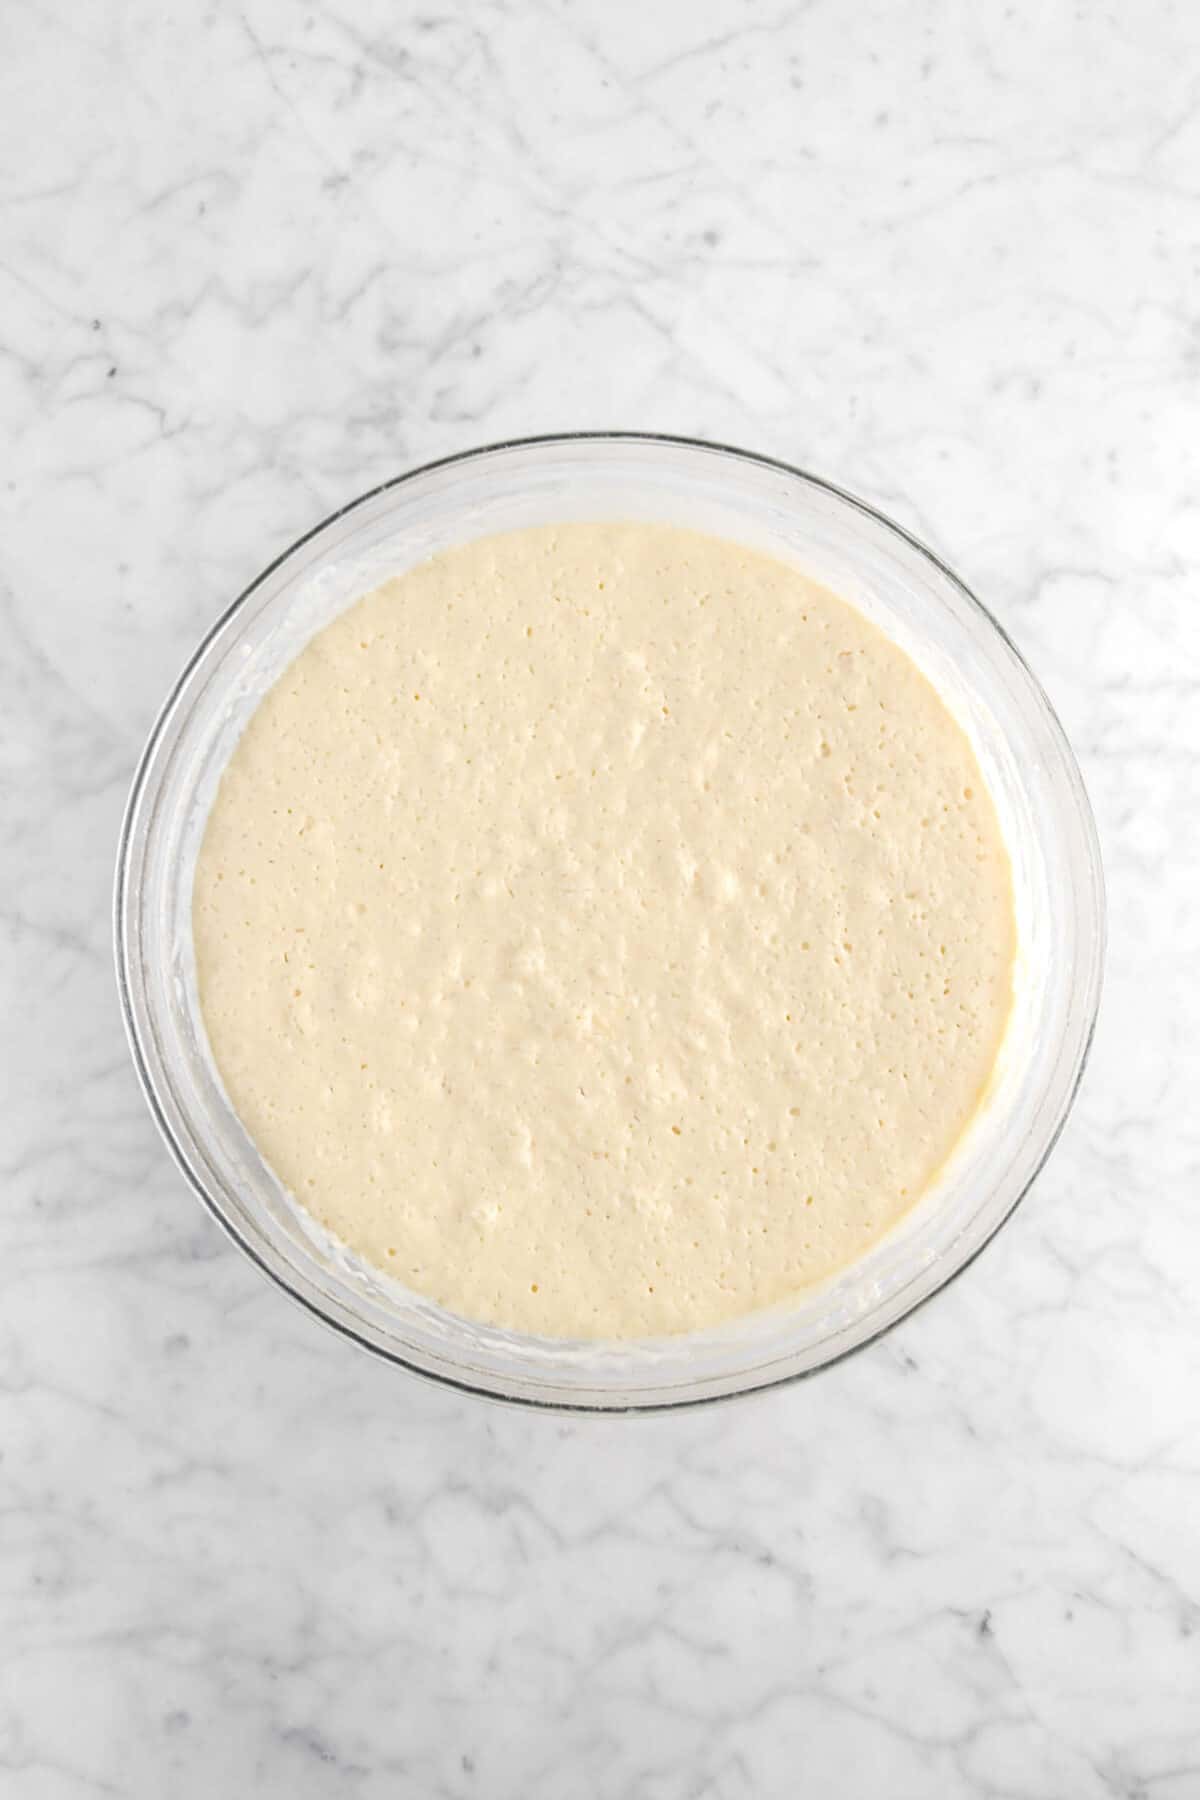
Once completely cooled, transfer into a large mixing bowl. Stir in the yeast and 4 cups of flour. Cover and allow to rise at room temperature for 1-2 hours, or until it has noticeably risen.
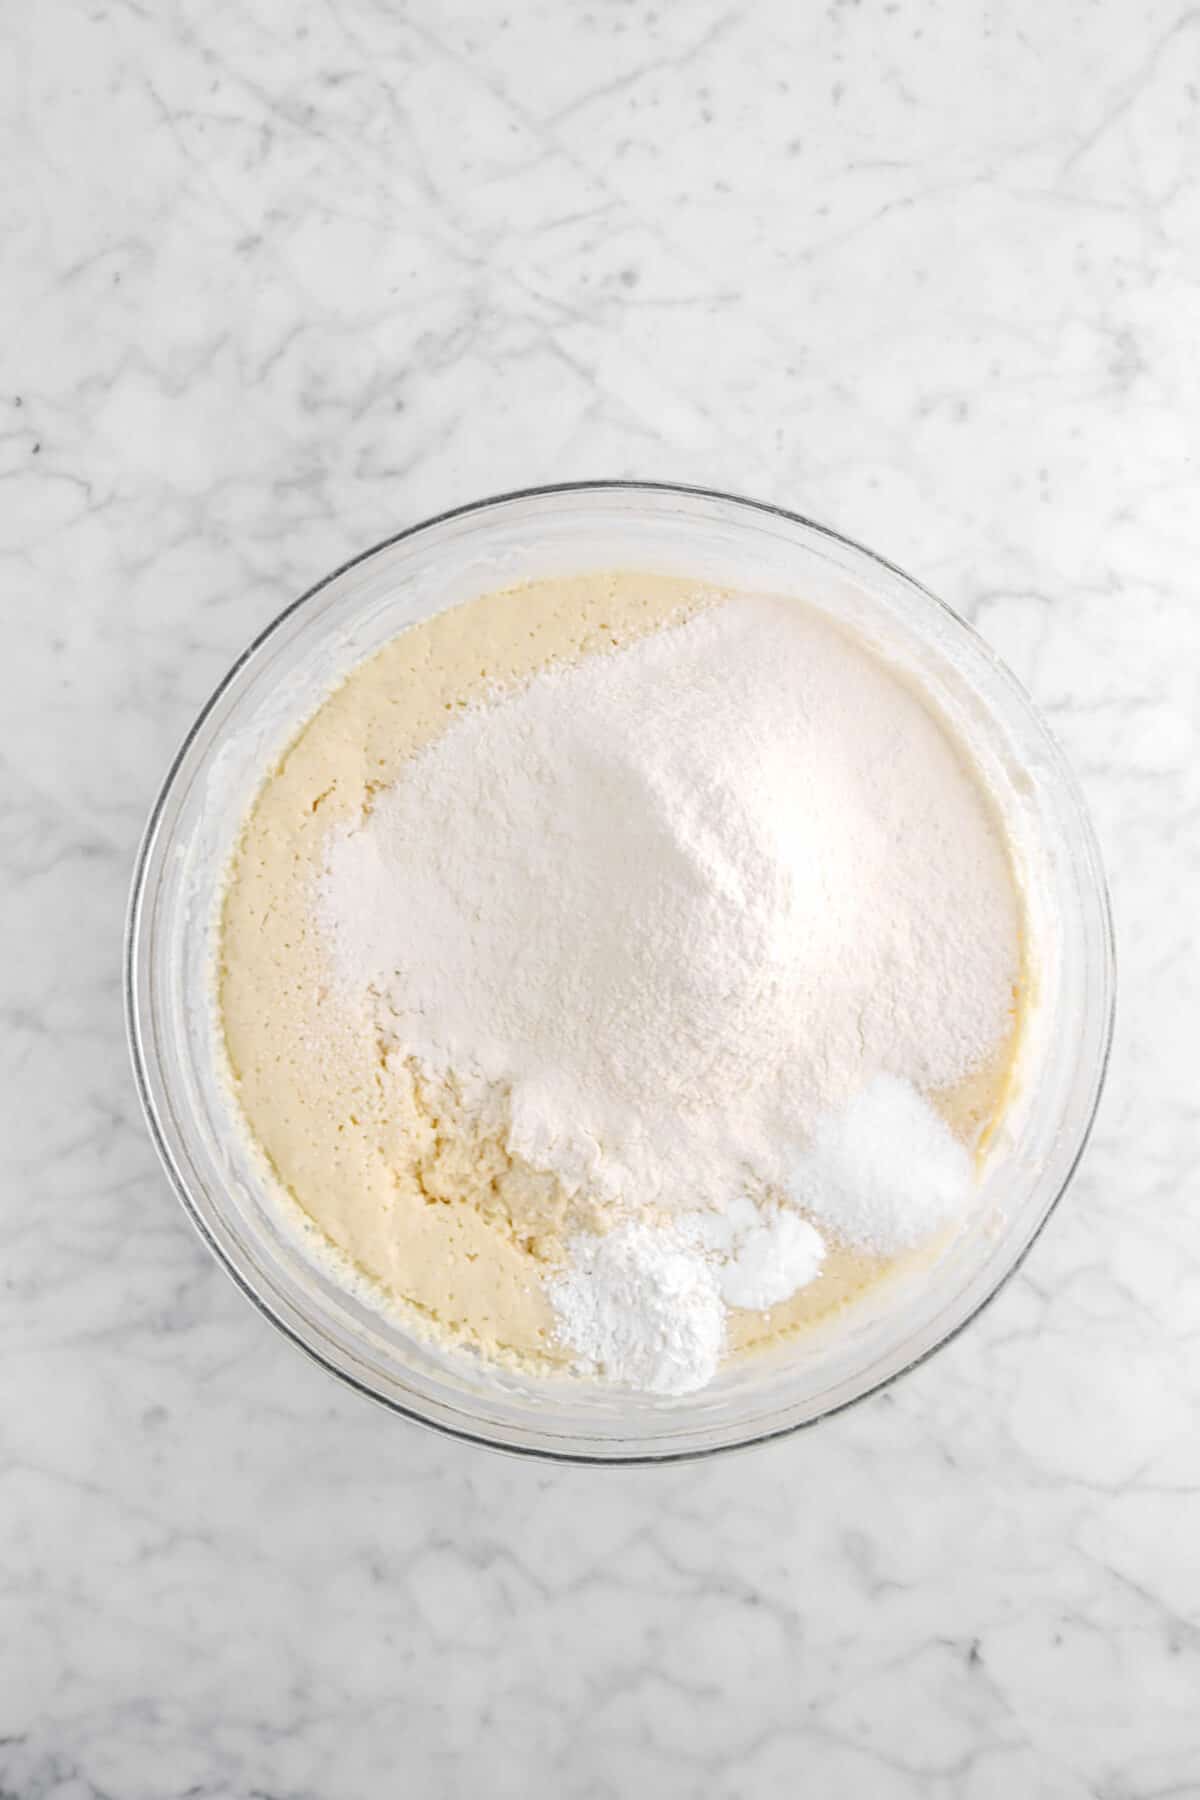
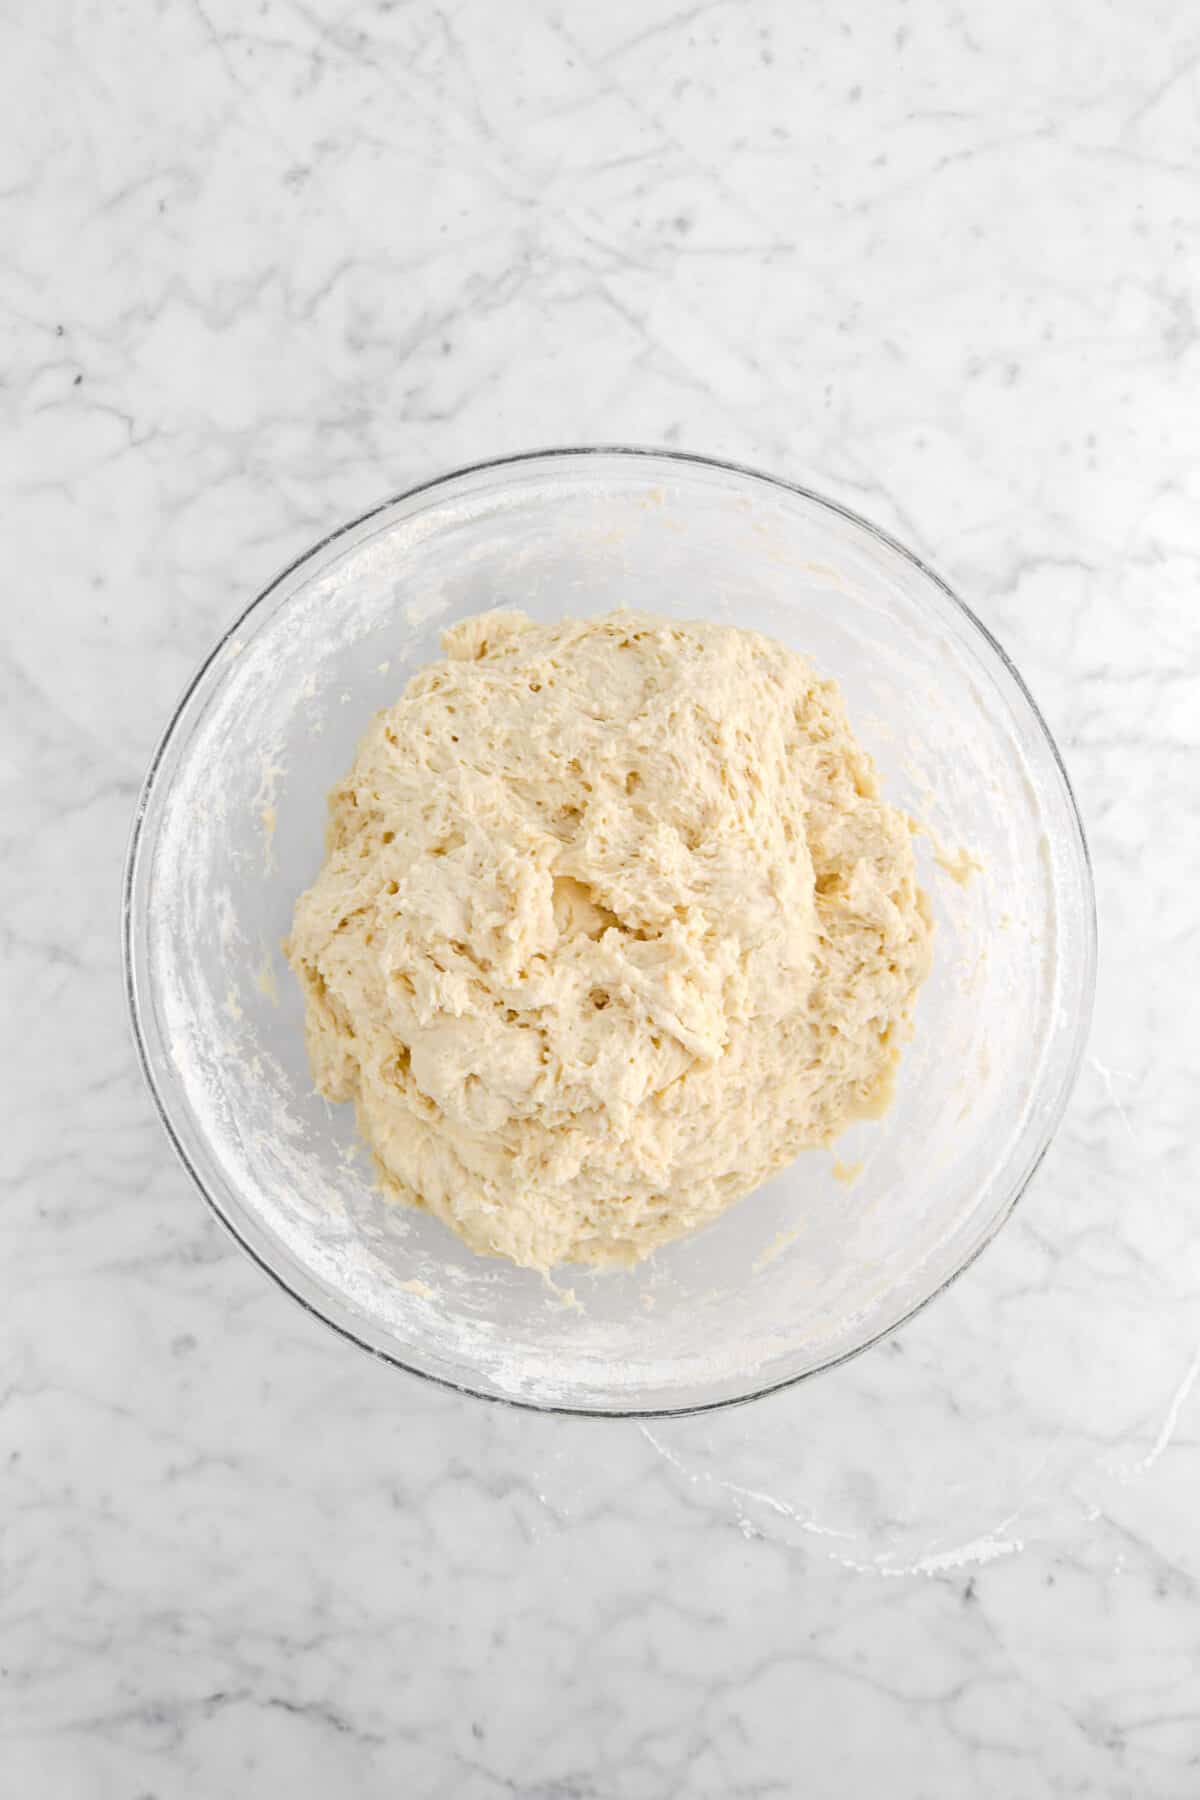
Stir in 2 cups of flour, baking soda, baking powder, and salt. Add more flour, 2 cups at a time, until a soft dough forms.
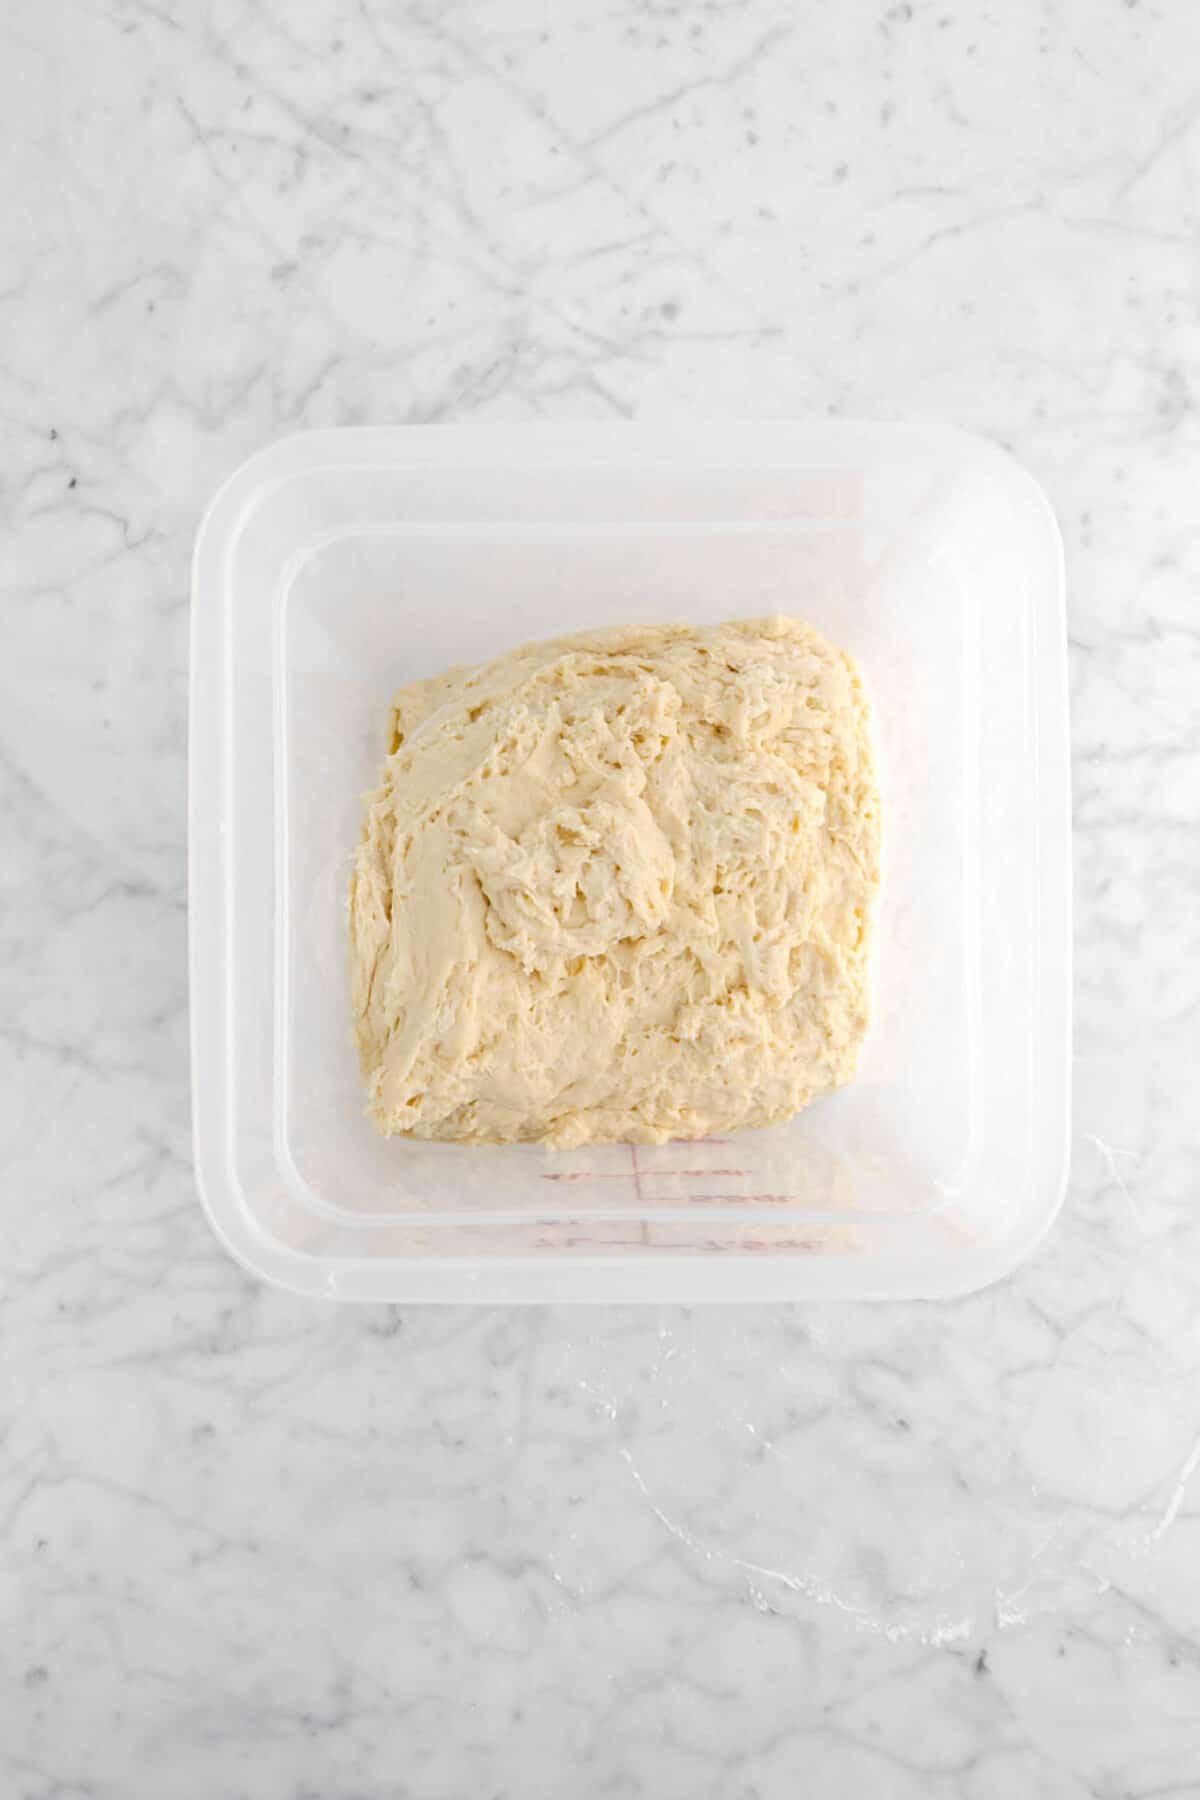
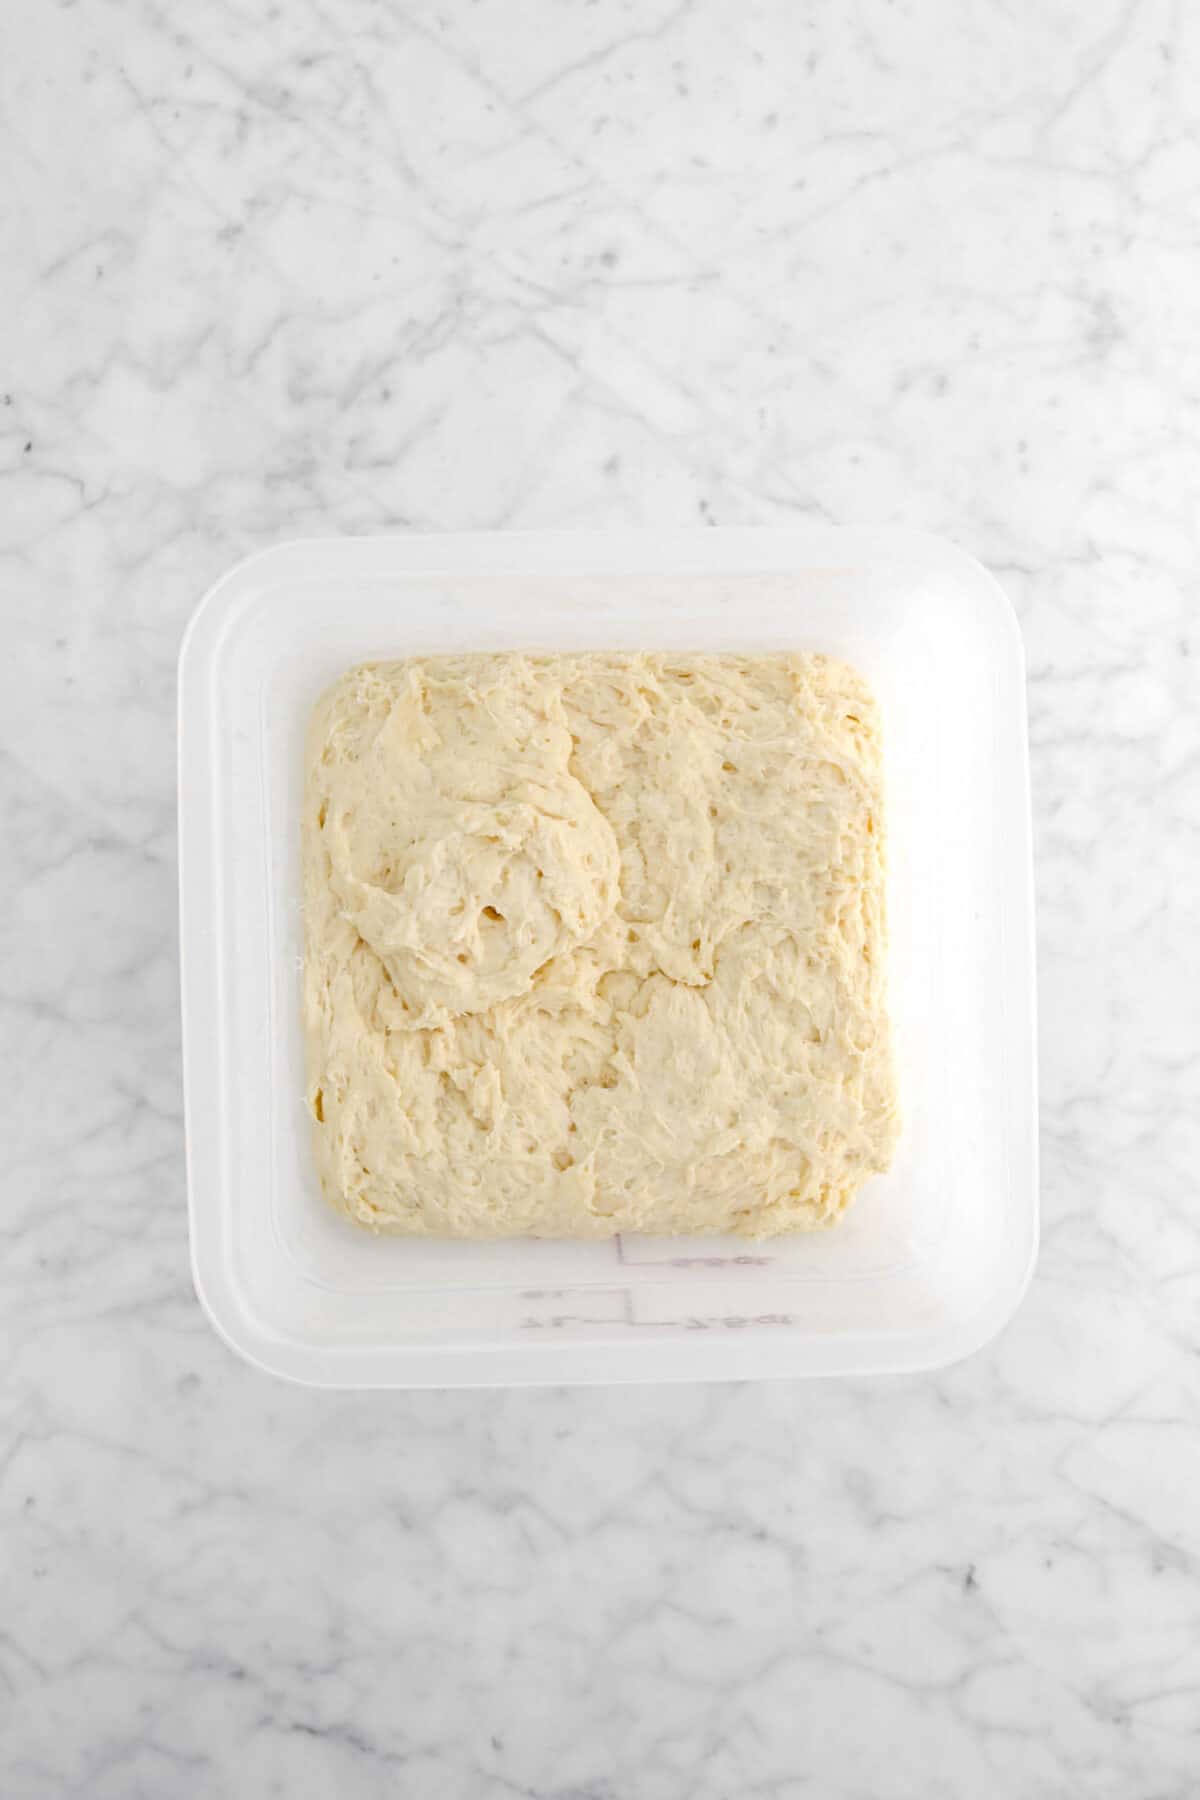
Transfer dough into an un-greased container and place in the fridge overnight.
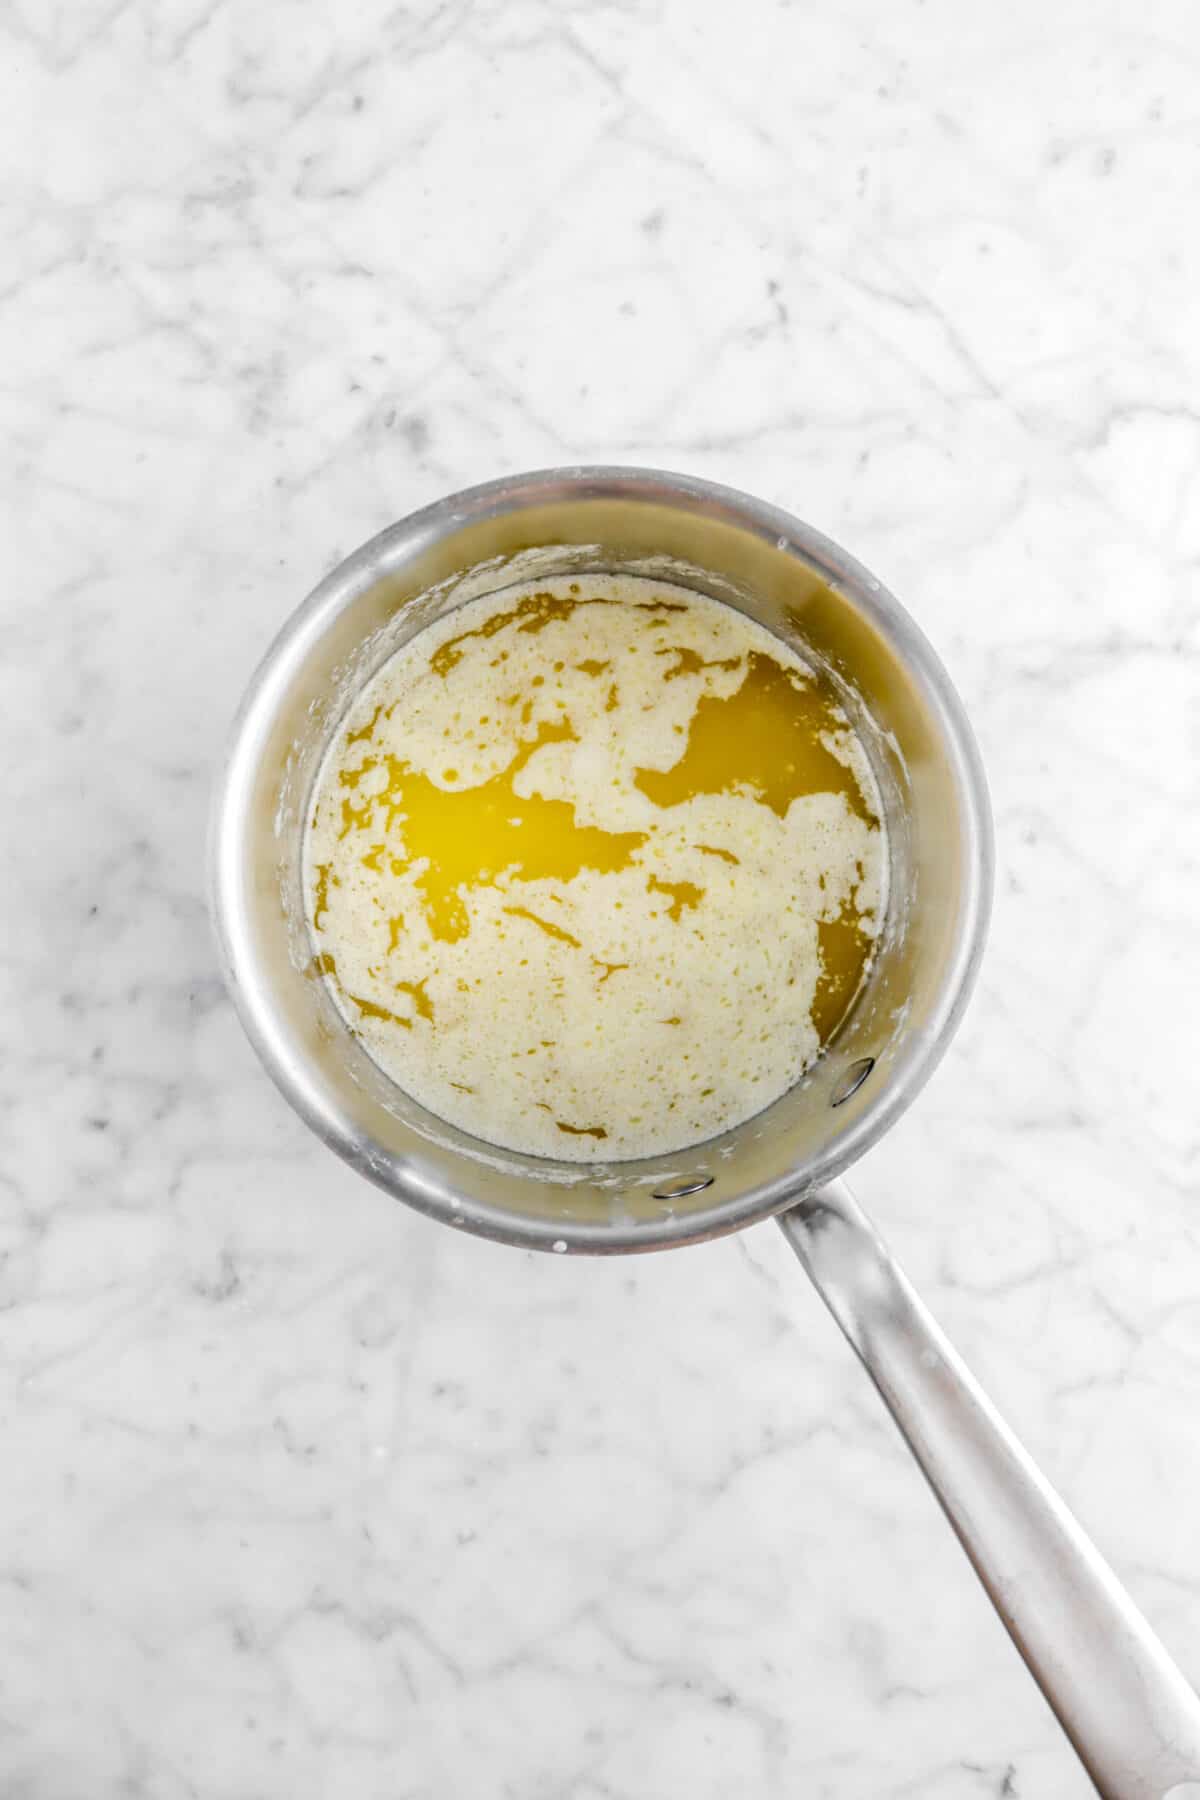
The next morning, melt the salted butter over low heat and transfer to a small bowl.
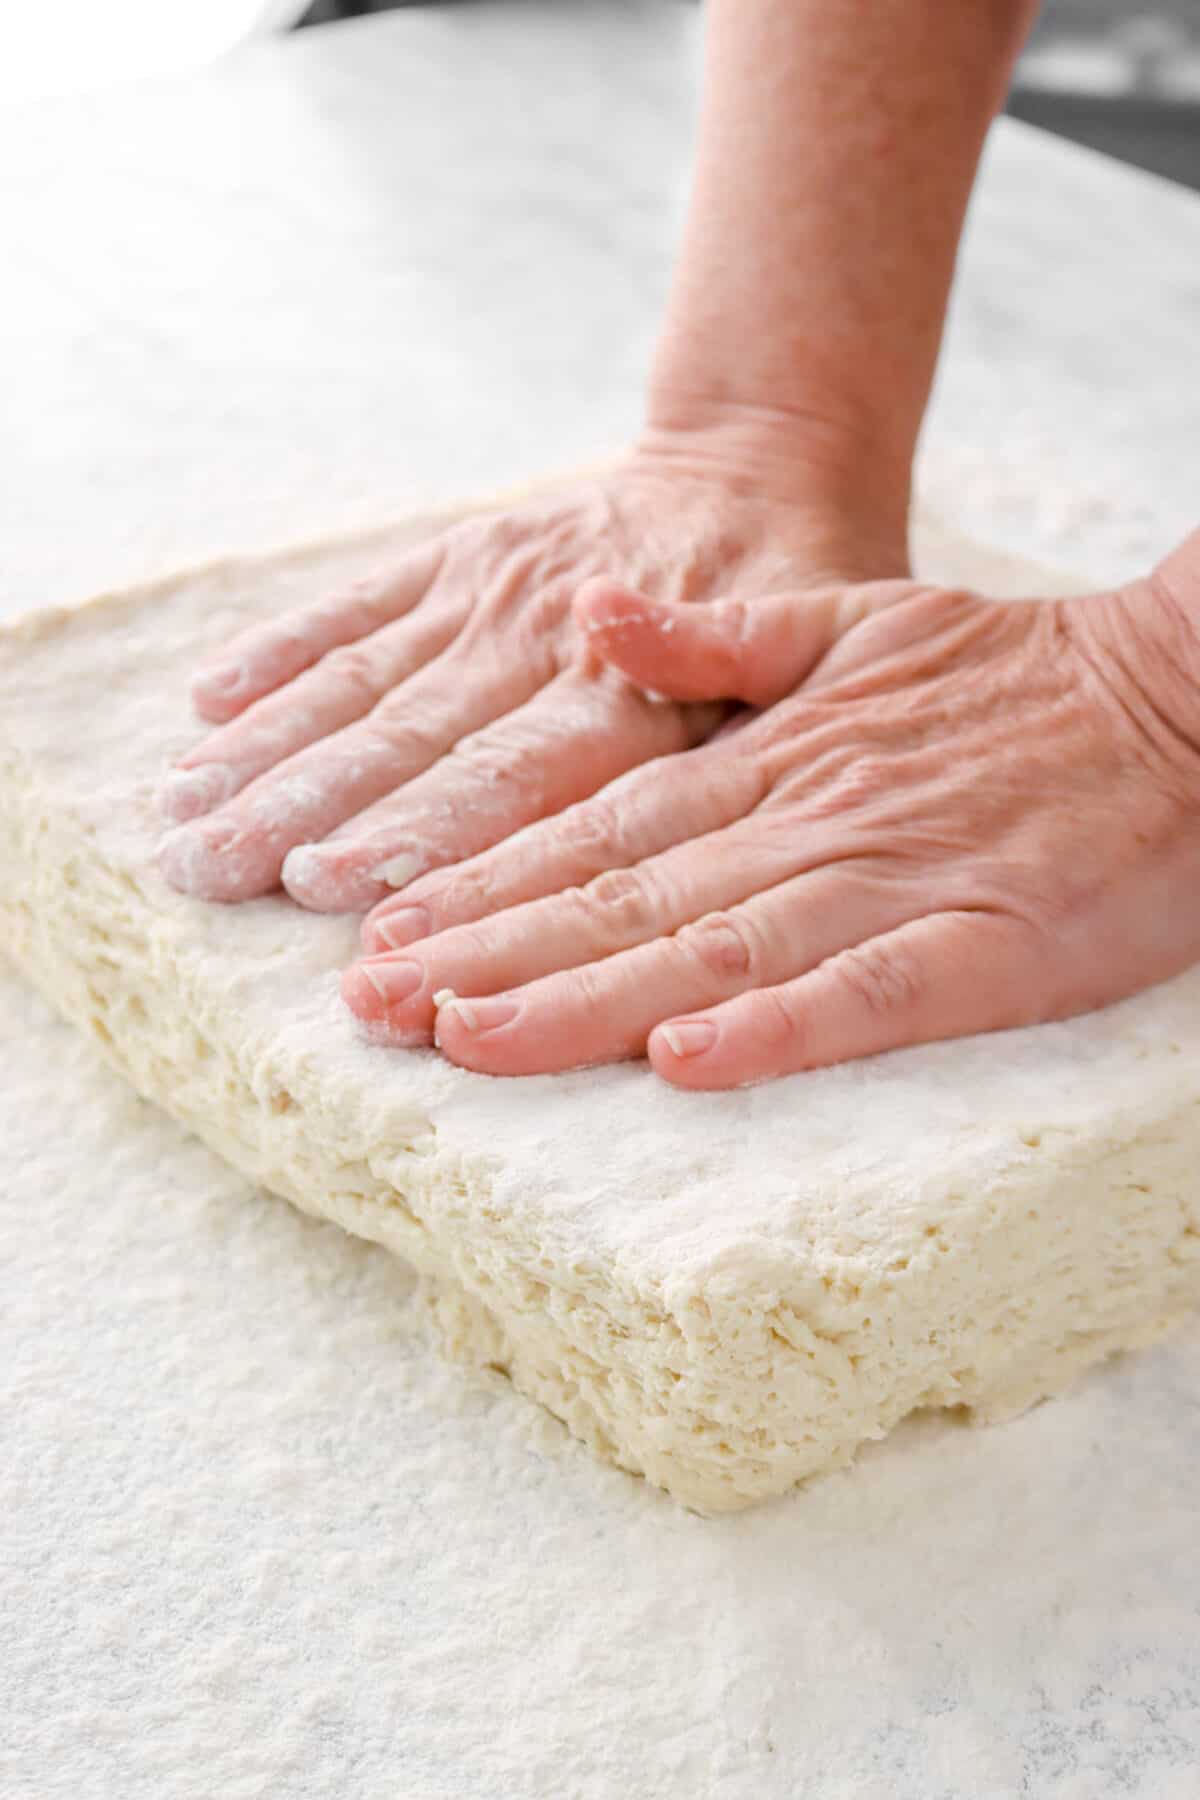
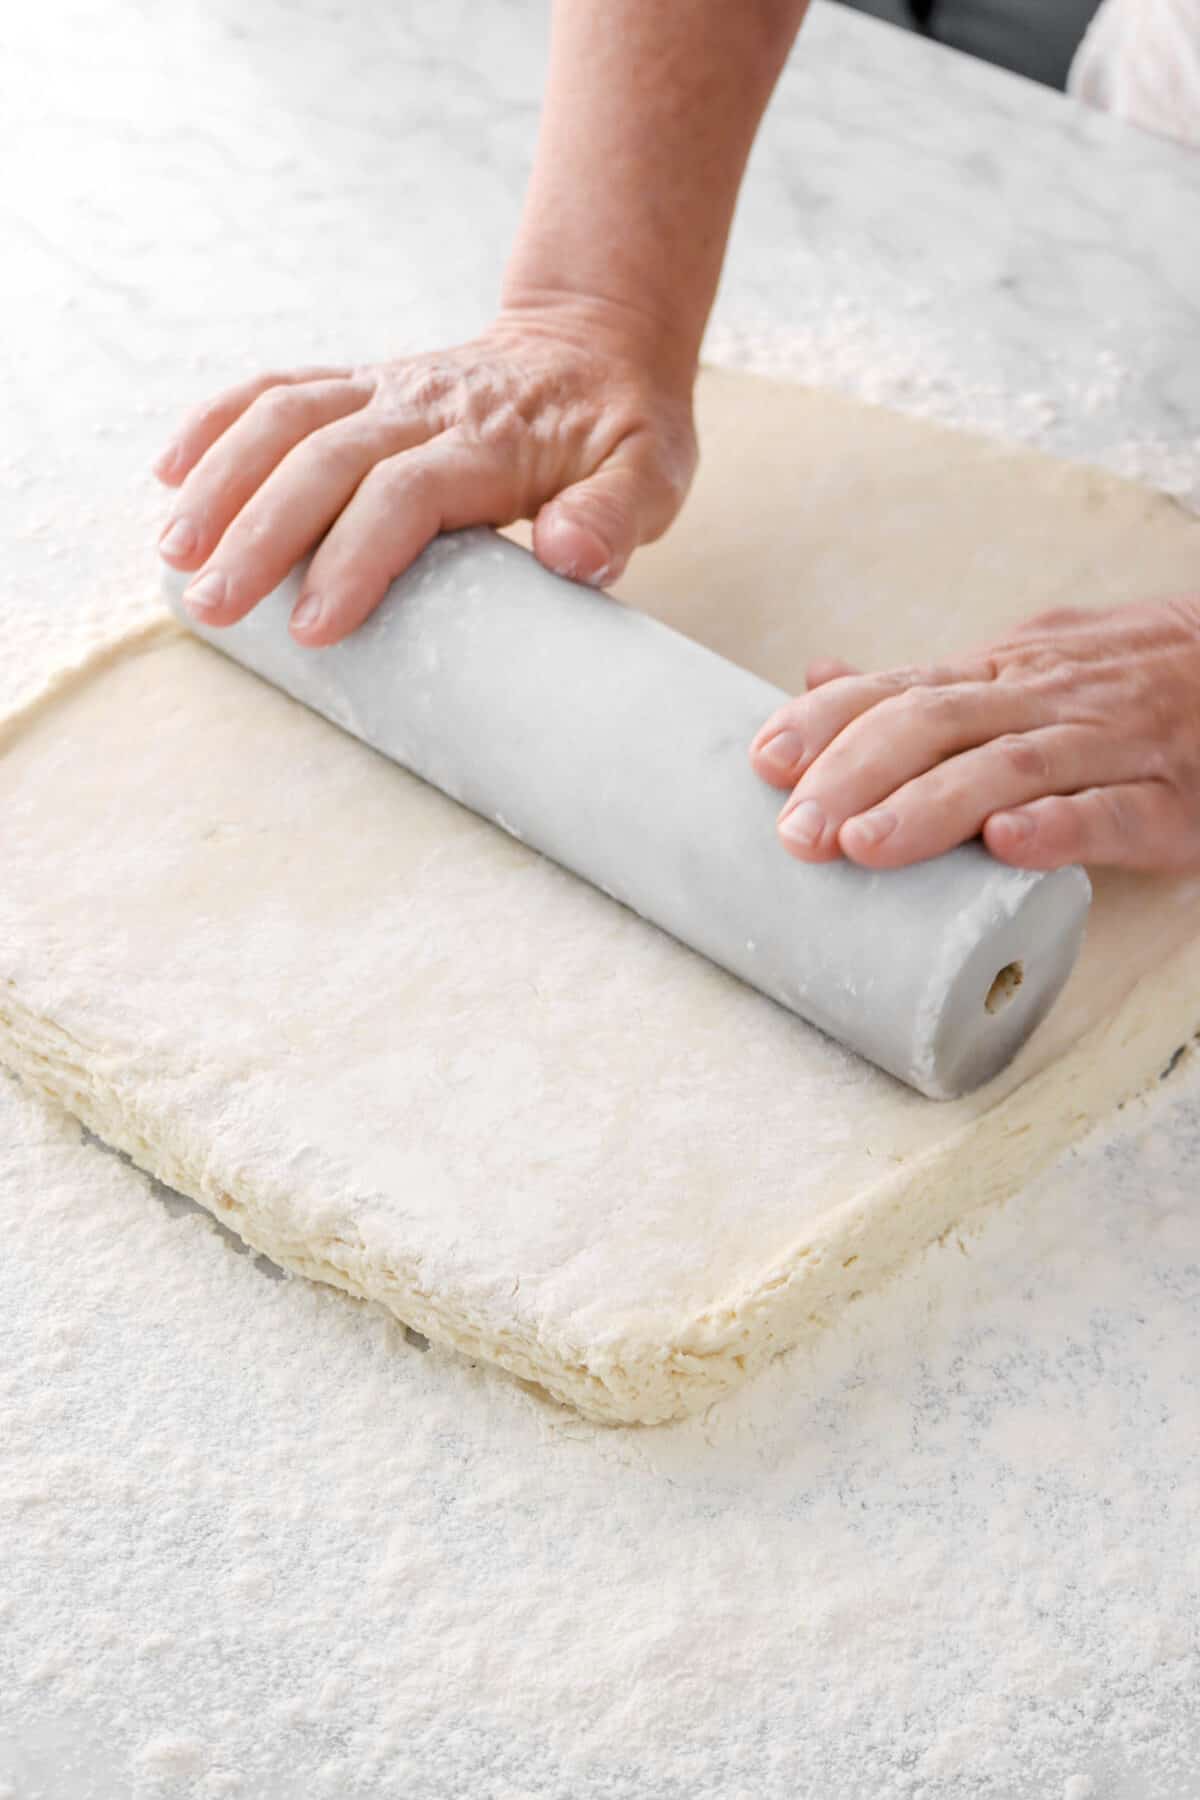
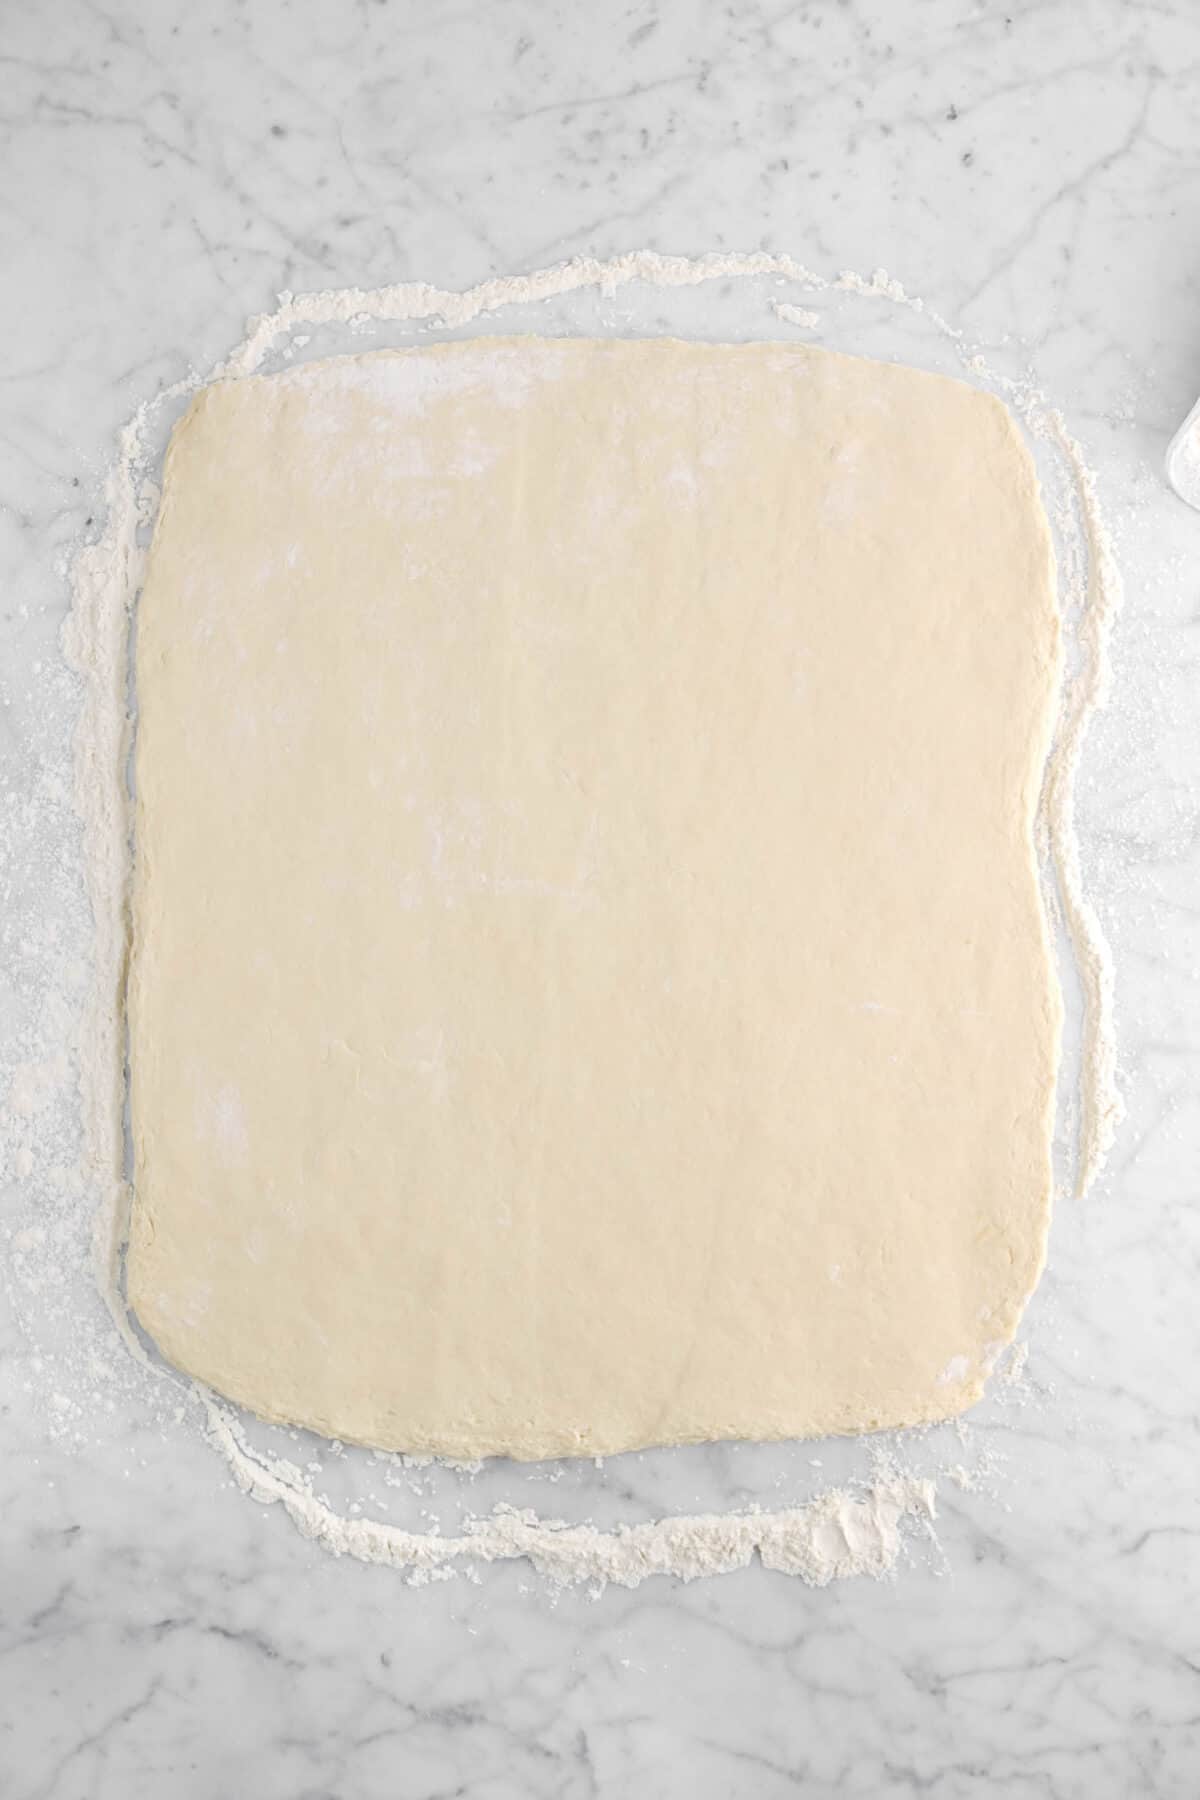
Dump out the cold dough on a heavily floured surface. For an easier time rolling, press the dough down slightly. Roll to about 1/4 inch thick.

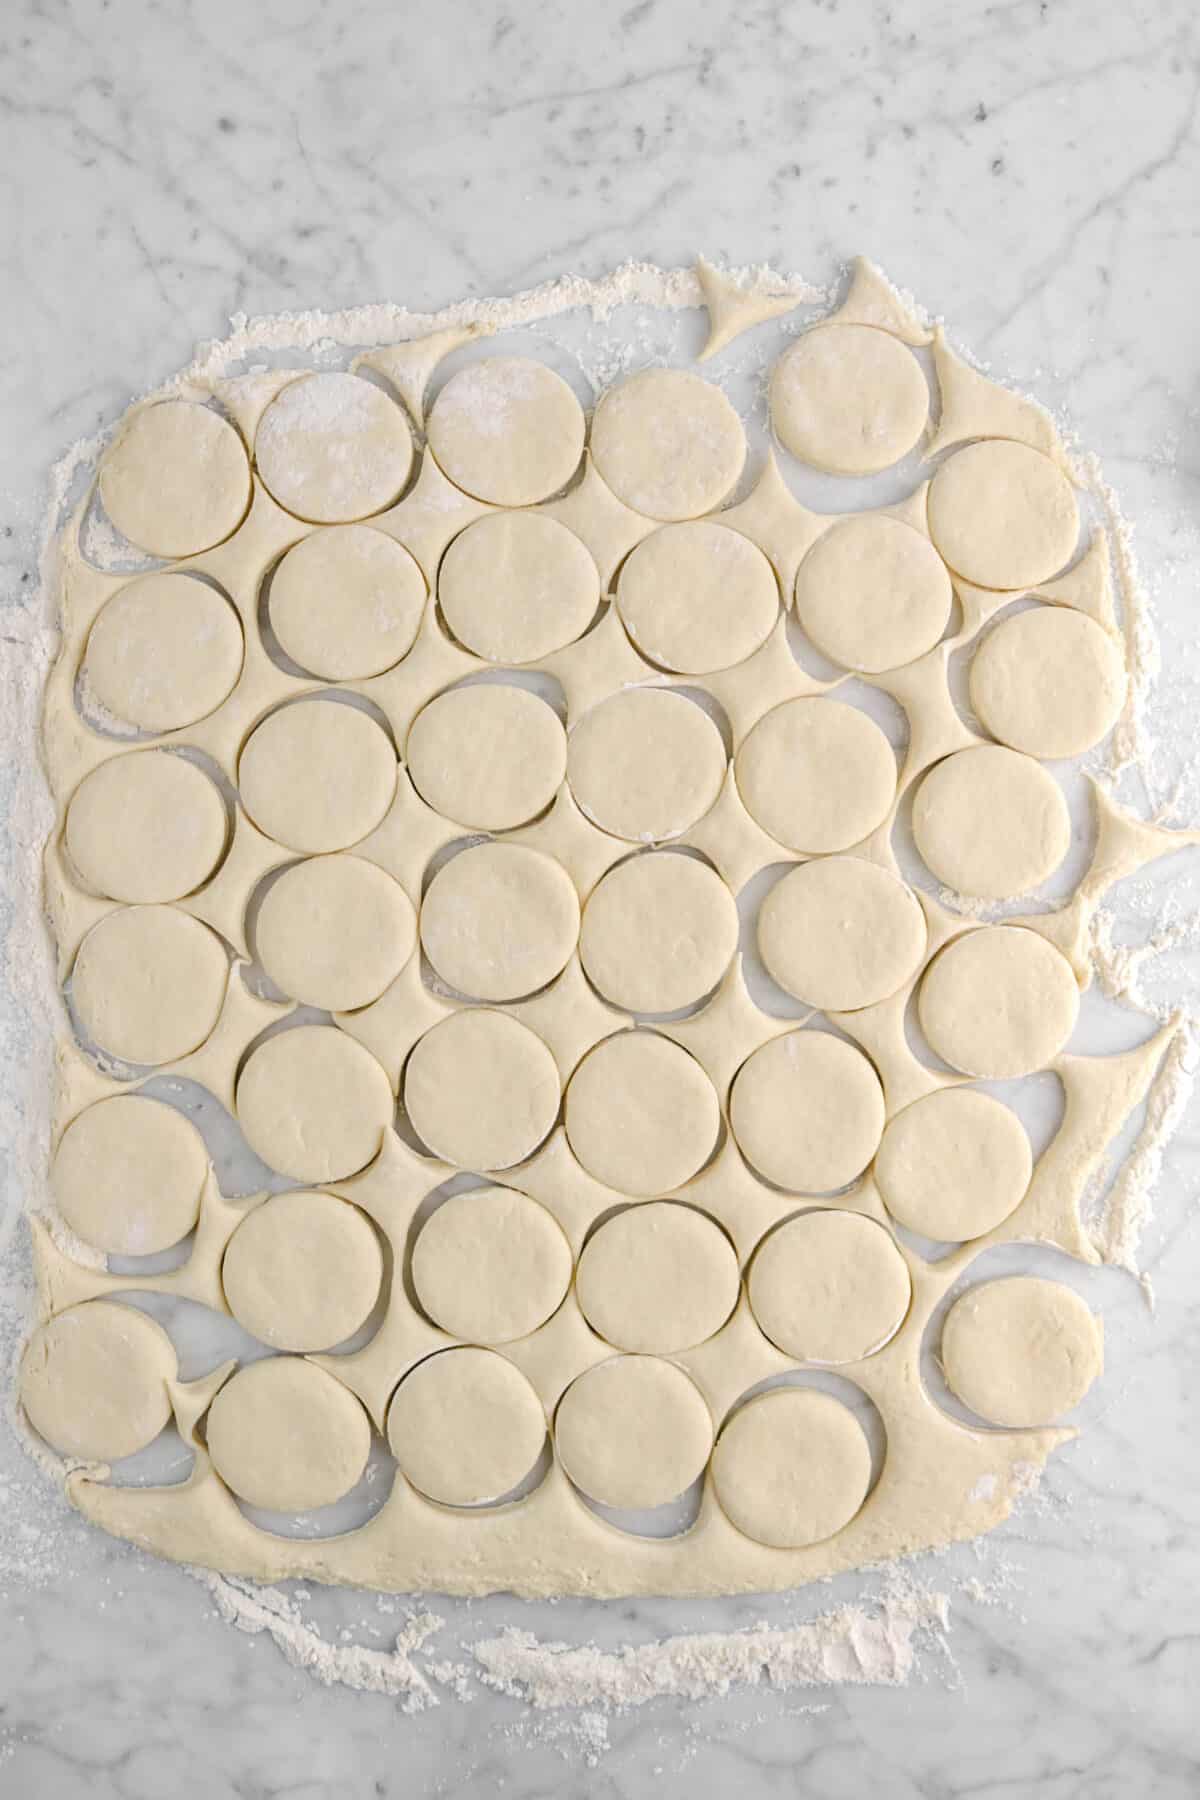
Cut out rounds using a 3-inch cutter.
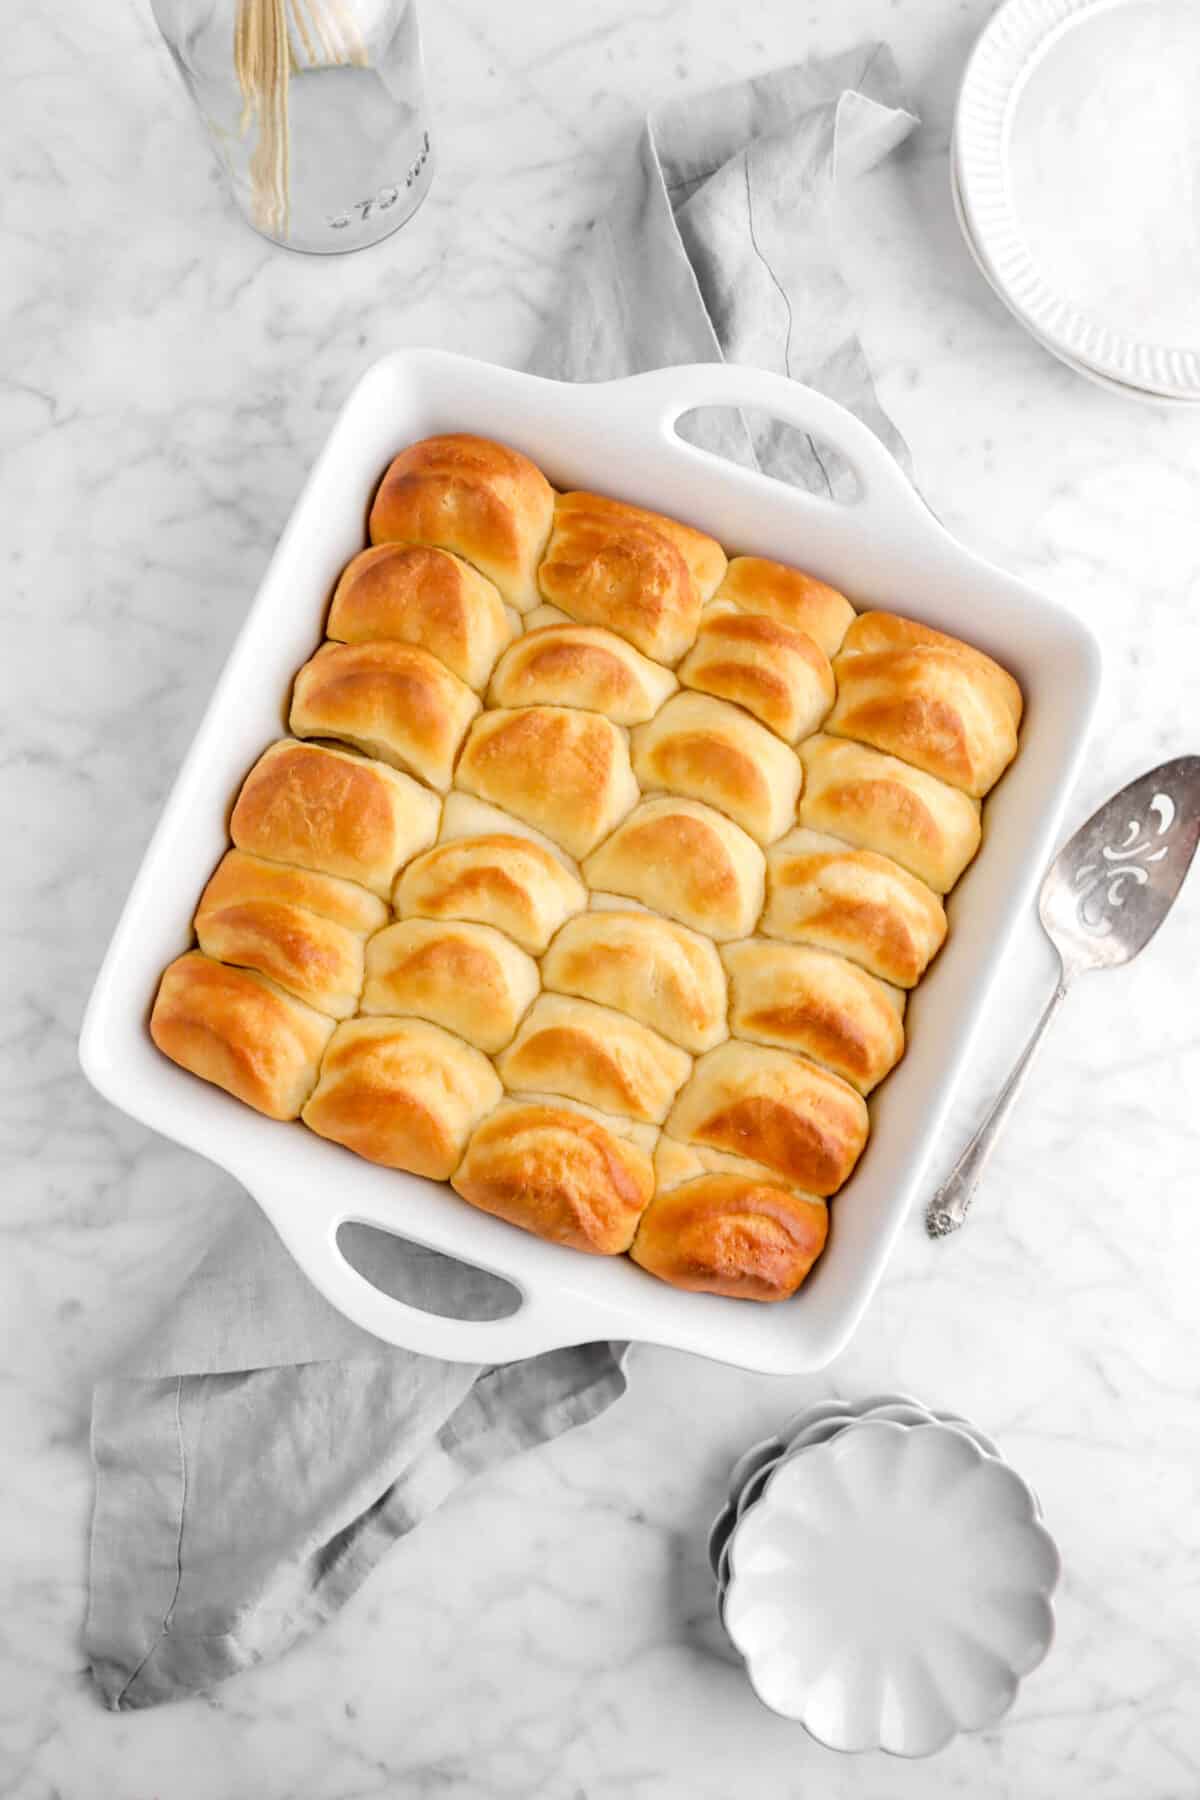
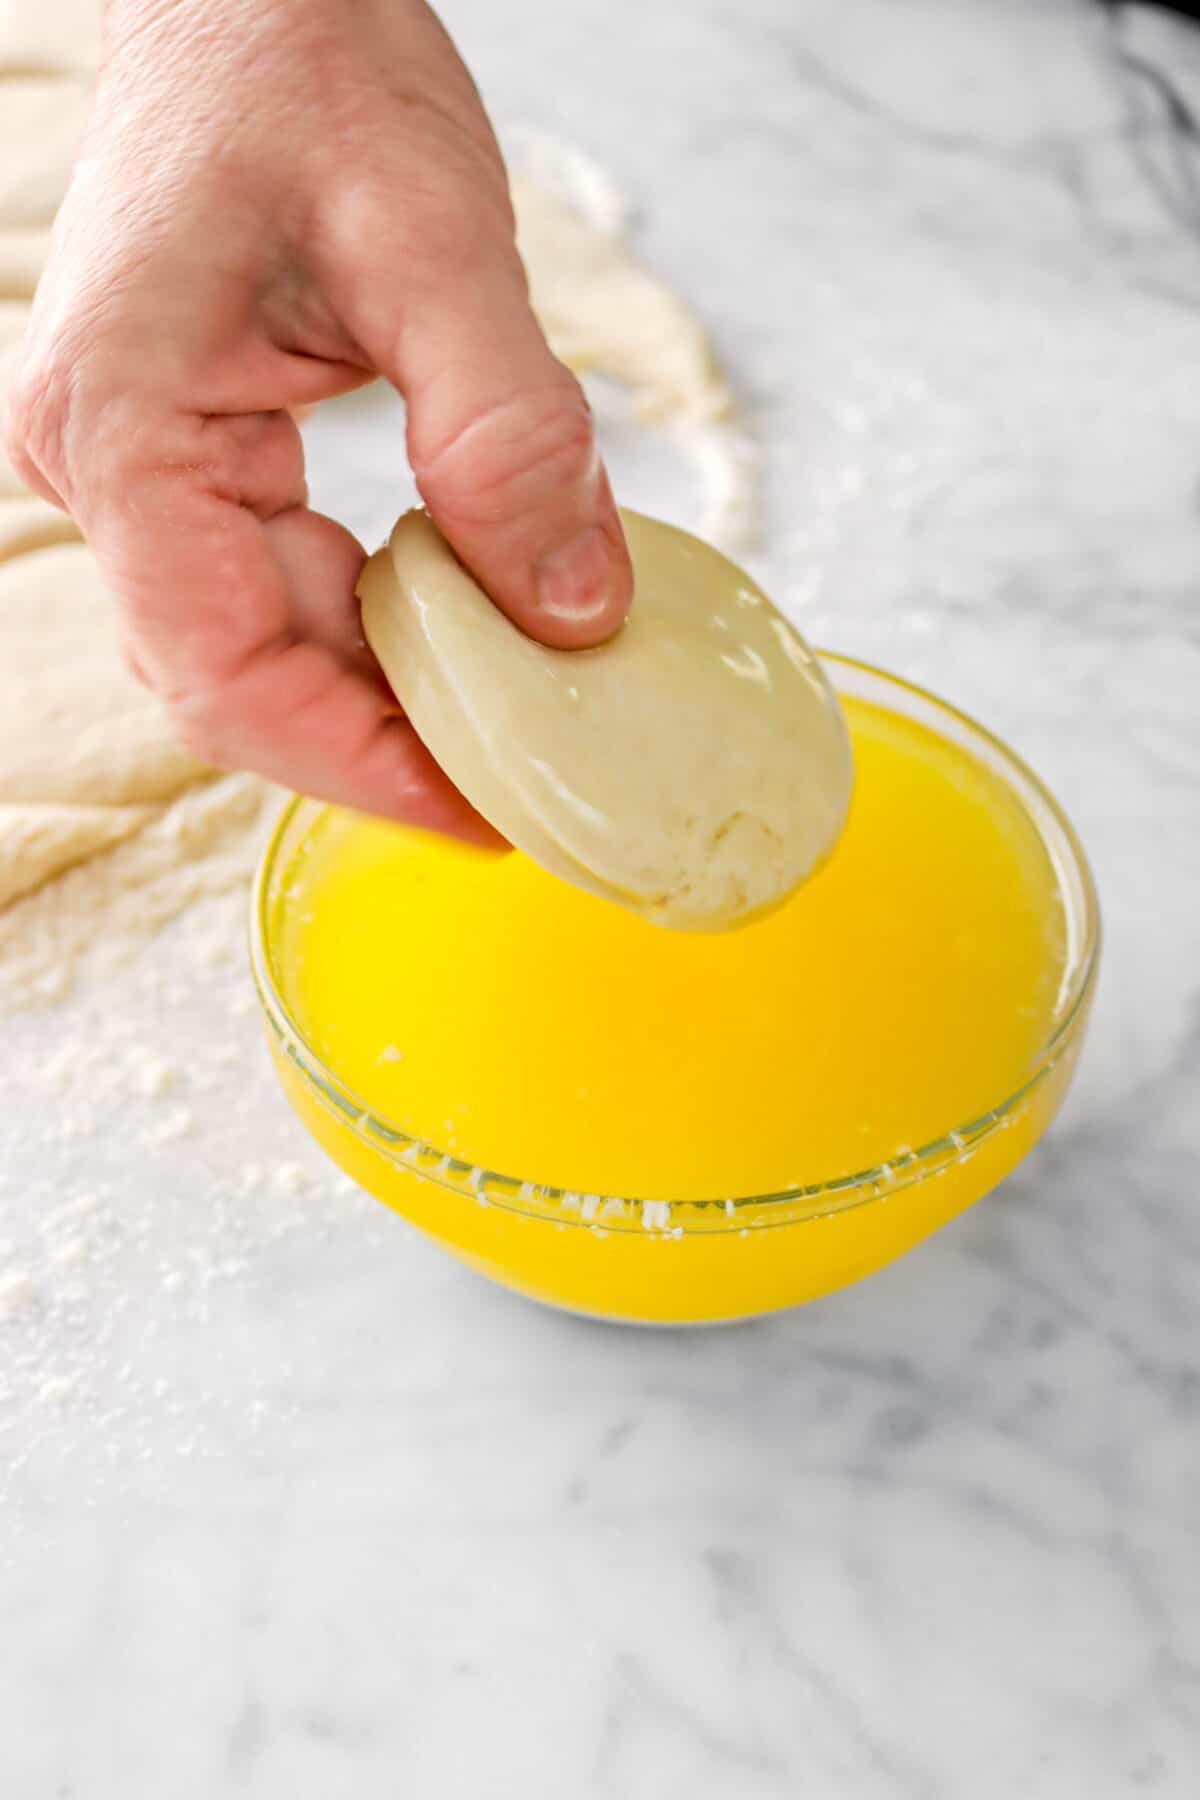
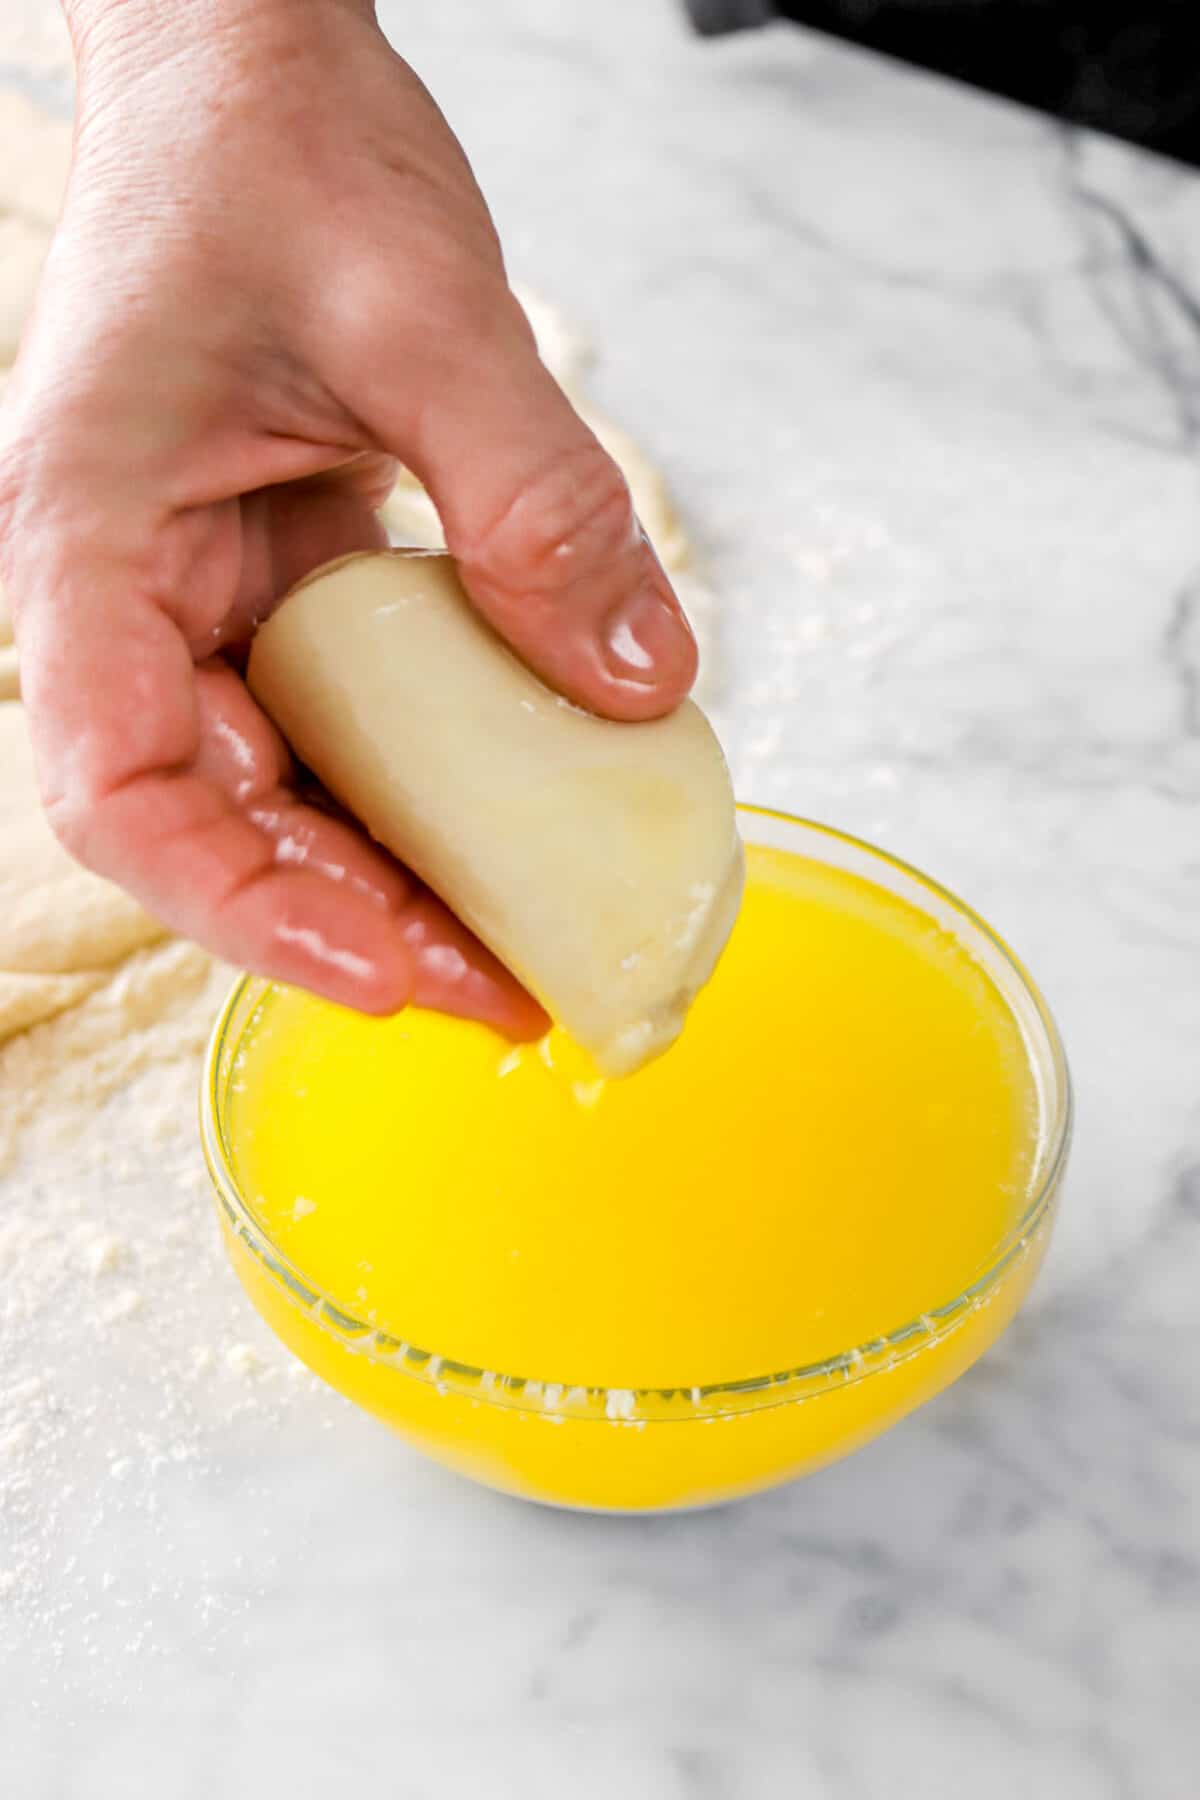
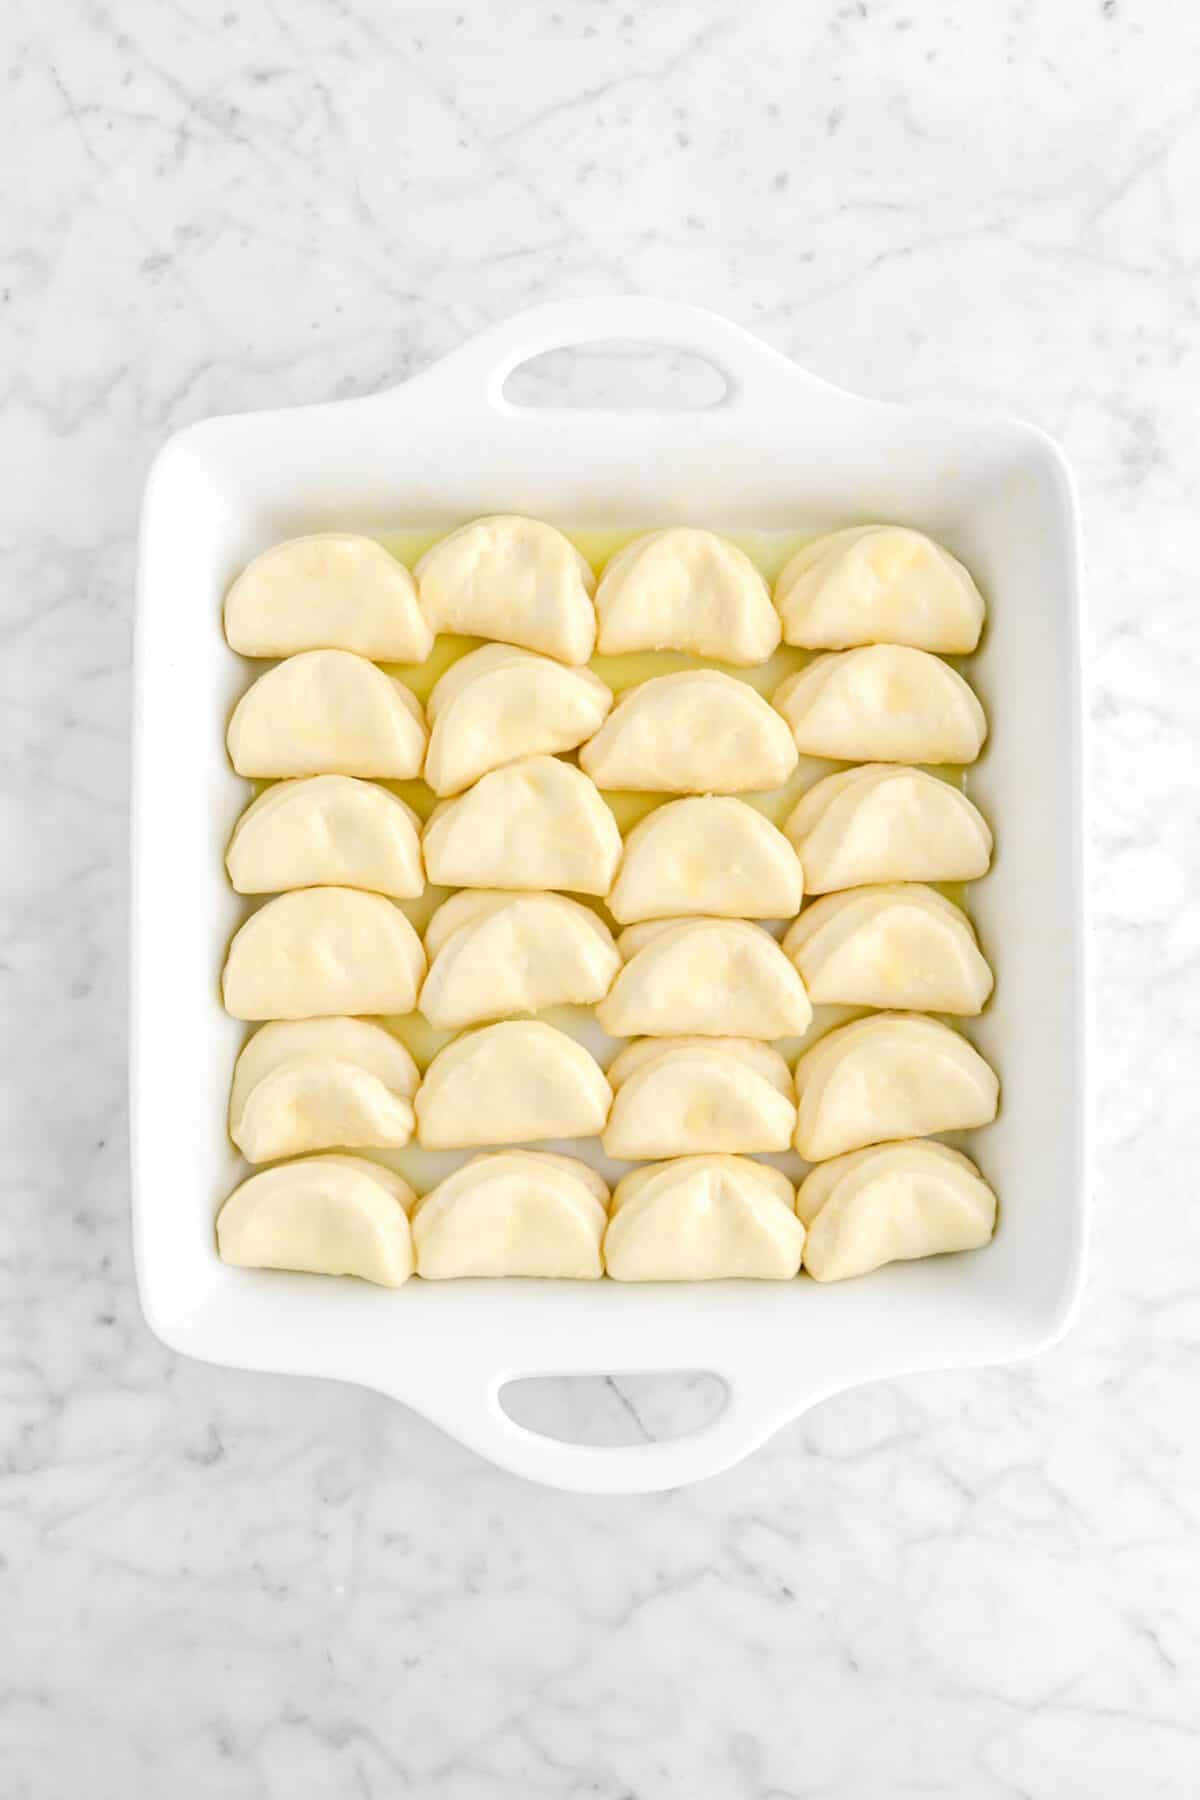
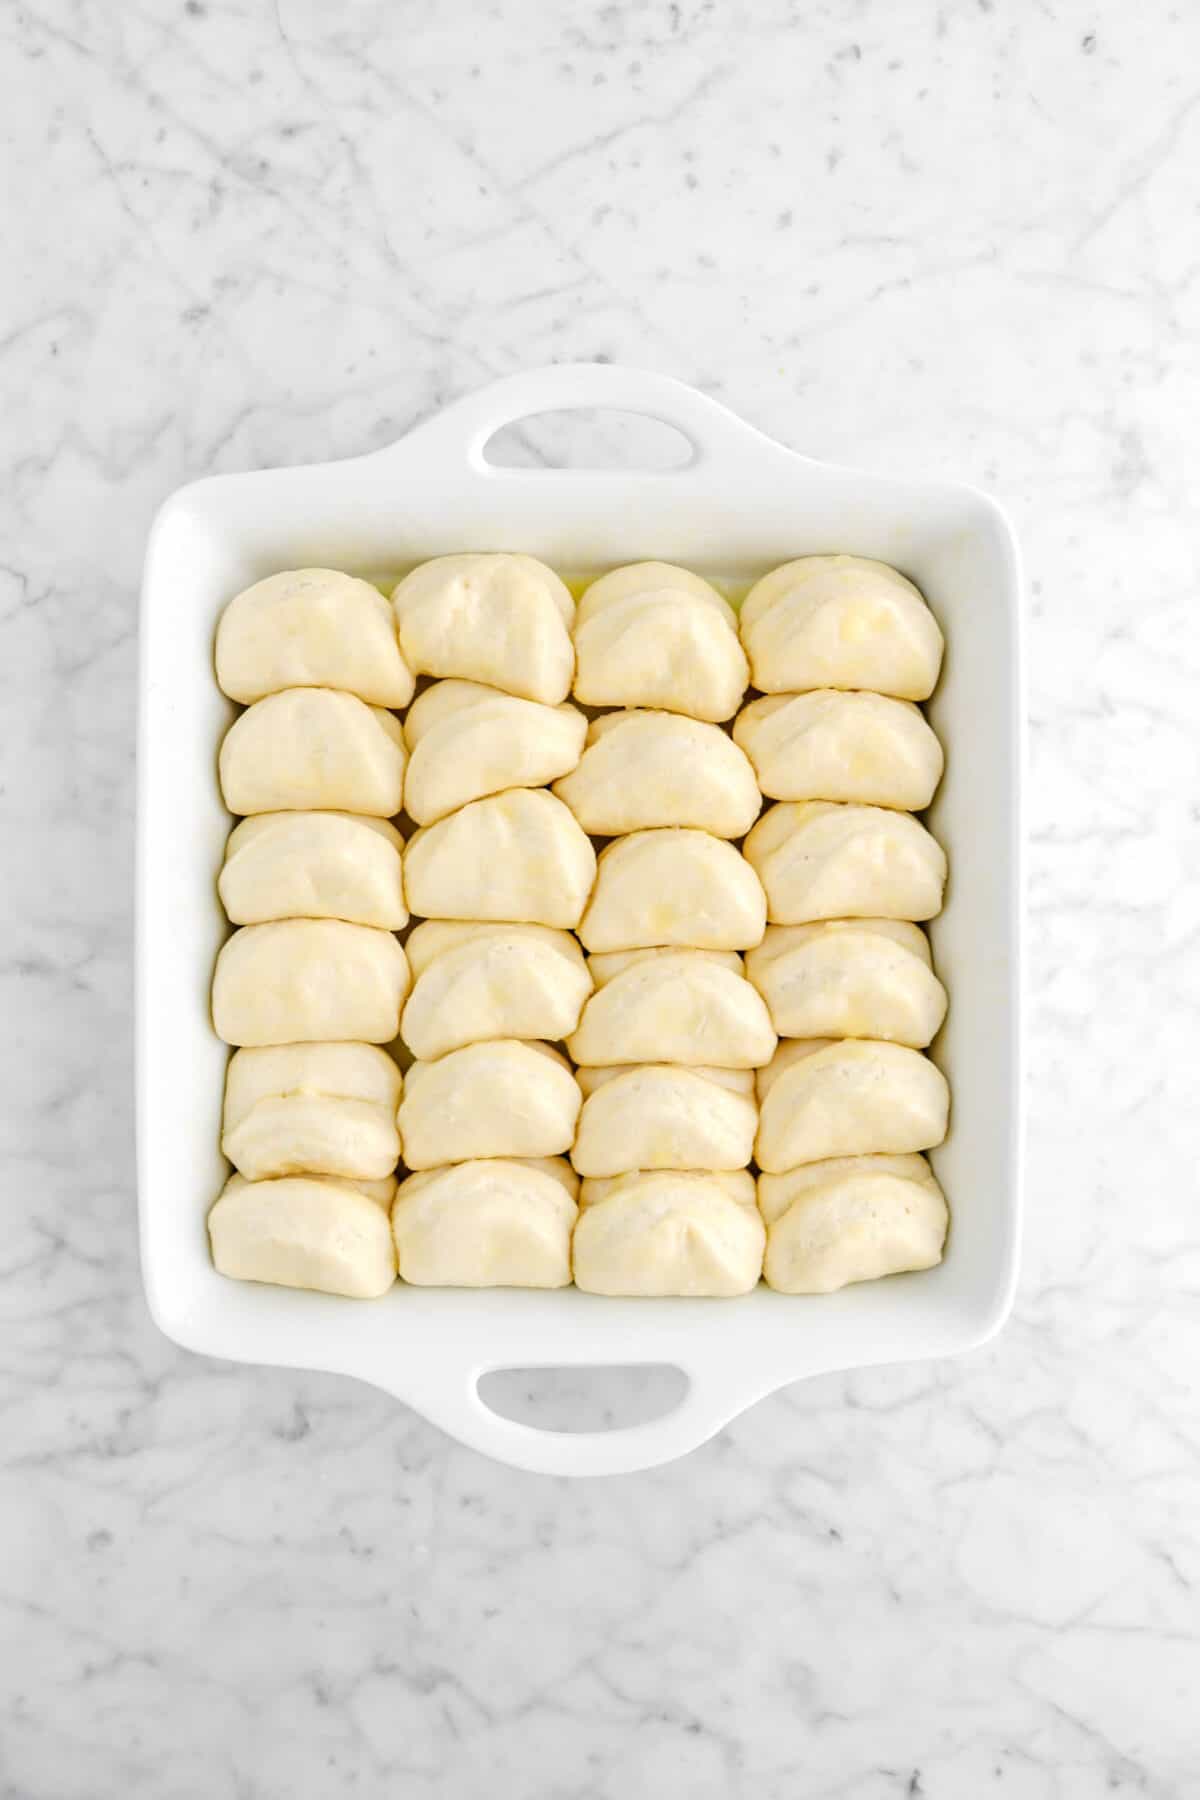
Dip the rounds, one at a time, into melted butter, fold in half and place in prepared pan.
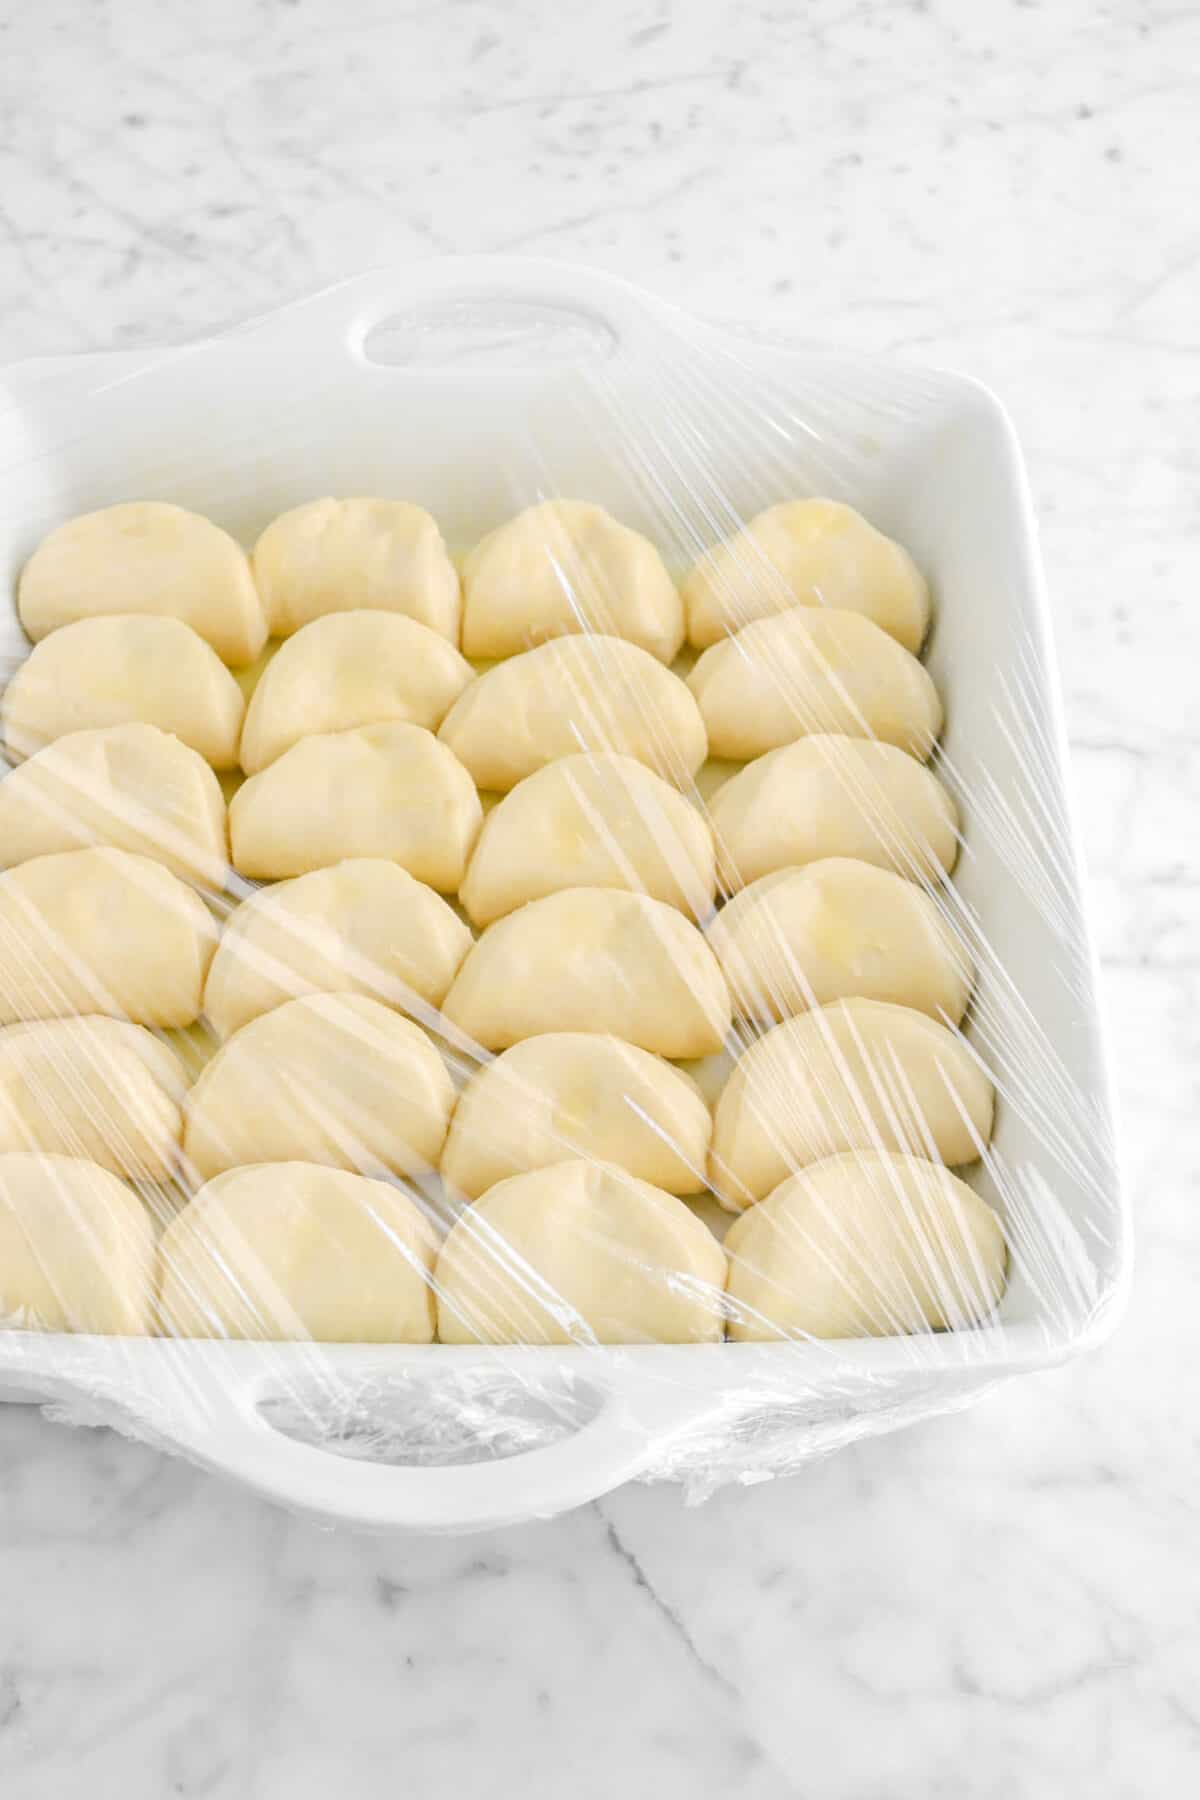
Cover with plastic wrap and allow to rise in a warm place 1 hour or until doubled in bulk. Once the rolls are covered, dust off any excess flour on the remain dough and re-roll. Repeat the previous steps until no more bread dough remains.
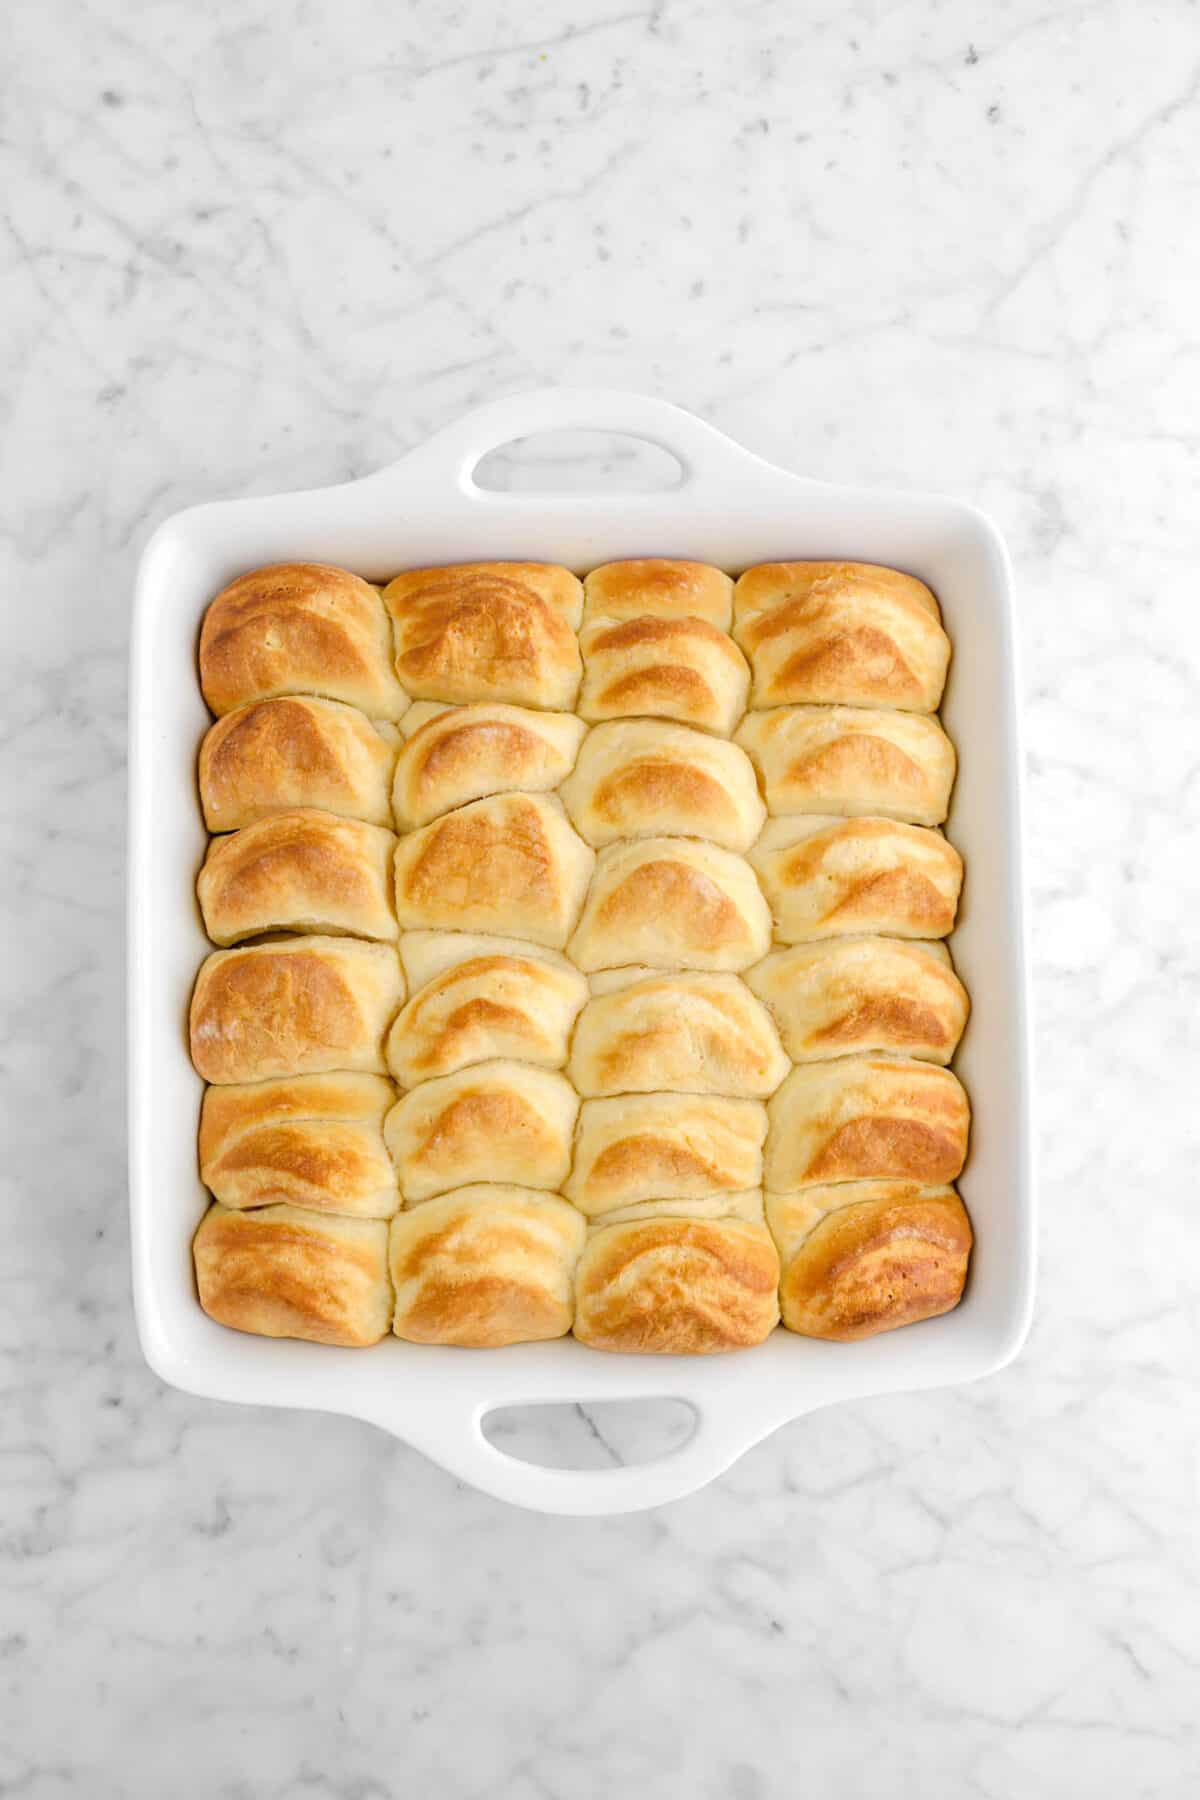
Bake the rolls at 375 degrees Fahrenheit until golden brown, about 20 minutes.
3 Tips for Baking with Yeast
If you’ve never baked with yeast, don’t worry! These rolls aren’t complicated and are pretty hard to mess up. They’re very forgiving and super easy to make, but here are a few quick tips to give you the best experience!
- Use Instant Yeast. There are two kinds of yeast out there. Dry Yeast (also known as instant and active dry) and Wet Yeast. You need to use Dry Yeast for this recipe.
- Check The Expiration Date. Make sure your yeast is in-date and active for this recipe to work!
- Don’t Nervous! Yeast is such a wonderful ingredient when it comes to making bread. There is no need to be nervous or intimidated. These rolls are a great start!
And always, just have fun and enjoy the process!
What to Make/Serve with Dinner Rolls
First, let me preface this by saying don’t limit yourself to just serving these rolls at dinner! They are an amazing addition to every meal, but especially breakfast. They make a delicious mini ham and cheese sandwich, I promise.
- Bourbon Sweet Potato Casserole with Roasted Marshmallows
- Shoepeg Corn and Green Bean Casserole
- Buttery Mashed Potatoes
- Southern Cornbread Dressing
You can also serve these rolls alongside your staple weeknight dinners!
How To Store
The best thing about these rolls is how well they store! You can keep them in the fridge for about a week or so, but the absolute best way to store them is in the freezer! Once baked, place the rolls in a freezer safe bag and store for up to 2 months in the freezer.
If you know in advance you want to freeze these rolls, bake them in disposable foil pan. This way, you can have a whole pan and re-heat them in the oven with ease! Just be sure to cover the rolls when you freeze them!
Expert Tips
- While the dough is rising, go ahead and spray the baking pans. You don’t wanna be dipping rolls in butter and trying to spray pans at the same time.
- This dough rolls out to be quite large so, make sure you have enough counter space to work with.
- Make sure to knock off excess flour from the rolls before dipping them into the butter.
- You might need to remelt the butter while you’re working. That’s okay. Just stick it in the microwave for a few seconds and get back to dipping!
- Altitude and/or weather may change how these bake and proving times. Keep an eye on the dough!
- You can make these rolls all in one day, but it can be very stressful. We highly recommend stretching this process out over two days.
- You can bake these rolls large casserole dishes, sheet pans, or disposable foil pans!
When you make these Buttery Pull-Apart Dinner Rolls, leave a comment down below! We love hearing from you and answering any questions you might have! Also, be sure to tag us on social media and hashtag it #BakersTable.
Buttery Pull-Apart Dinner Rolls
Ingredients
- 4 cups whole milk
- 1 cup unsalted butter
- ¾ cup granulated sugar
- 1 ½ Tablespoons yeast
- 8-10 cups all purpose flour,, divided and sifted
- ½ teaspoon baking soda
- 2 teaspoons baking powder
- 1 Tablespoon kosher salt
- 1 ½ cups salted butter
Instructions
- Combine milk, unsalted butter, and sugar in a medium saucepan.
- Place over low heat and stir until sugar dissolves and butter melts.
- Remove from heat and allow to cool.
- Once cool, stir in yeast and 4 cups of flour.
- Cover and allow to rise at room temperature for 1-2 hours, until dough swells noticeably.
- Stir in baking soda, baking powder, and salt.
- Stir in the rest of the flour 2 cups at a time until a soft dough forms.
- Place dough into a large ungreased lidded container.
- Refrigerate overnight.
- The next day, melt salted butter over low heat and transfer to a small bowl.
- Spray baking pans with cooking spray.
- Roll dough out on a heavily floured surface.
- Cut out rounds using a 3-inch cutter.
- Dip rounds, one at a time, into melted butter, fold in half and place in prepared pan.
- Allow to rise in a warm place 1 hour or until doubled in bulk.
- While rolls are rising, heat oven to 375 degrees Fahrenheit.
- Bake rolls until golden brown, about 15-20 minutes.
- Serve hot.
Notes + Tips!
- While the dough is rising, go ahead and spray the baking pans. You don’t wanna be dipping rolls in butter and trying to spray pans at the same time.
- This dough rolls out to be quite large so, make sure you have enough counter space to work with.
- Make sure to knock off excess flour from the rolls before dipping them into the butter.
- You might need to remelt the butter while you’re working. That’s okay. Just stick it in the microwave for a few seconds and get back to dipping!
- Altitude and/or weather may change how these bake and proving times. Keep an eye on the dough!
- You can make these rolls all in one day, but it can be very stressful. We highly recommend stretching this process out over two days.
- You can bake these rolls large casserole dishes, sheet pans, or disposable foil pans!
Tools You May Need (affiliate links)
Nutrition
Nutritional information is only an estimate. The accuracy of the nutritional information for any recipe on this site is not guaranteed.
– Still Hungry? –
Here are a few recipes may like!

Delicious fluffy buttery tasteful pull apart bread. Perfect!
Easy to make and really easy to eat!!!!!